Building on Windows
To build TorchAudio on Windows, we need to enable C++ compiler and install build tools and runtime dependencies.
We use Microsoft Visual C++ for compiling C++ and Conda for managing the other build tools and runtime dependencies.
1. Install build tools
MSVC
Please follow the instruction at https://visualstudio.microsoft.com/downloads/, and make sure to install C++ development tools.
Note
The official binary distribution are compiled with MSVC 2019. The following section uses path from MSVC 2019 Community Edition.
Conda
Please follow the instruction at https://docs.conda.io/en/latest/miniconda.html.
2. Start the dev environment
In the following, we need to use C++ compiler (cl), and Conda package manager (conda).
We also use Bash for the sake of similar experience to Linux/macOS.
To do so, the following three steps are required.
Open command prompt
Enable developer environment
[Optional] Launch bash
The following combination is known to work.
Launch Anaconda3 Command Prompt.
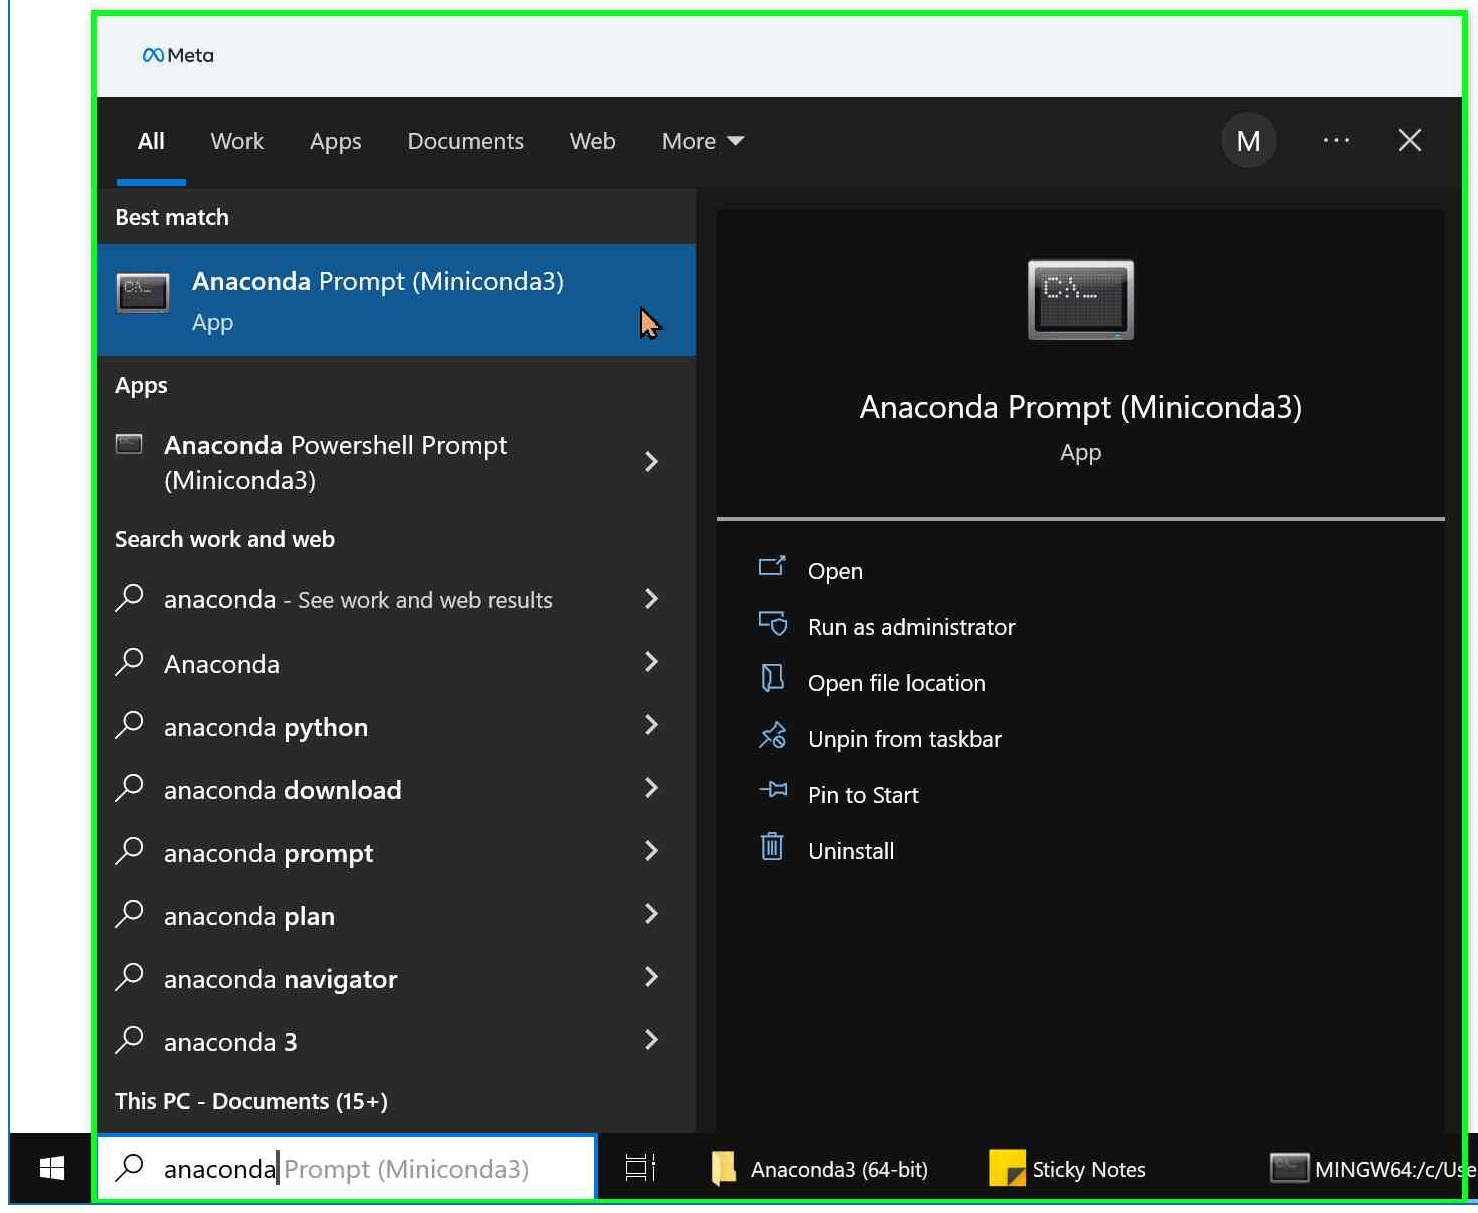
Please make sure that
condacommand is recognized.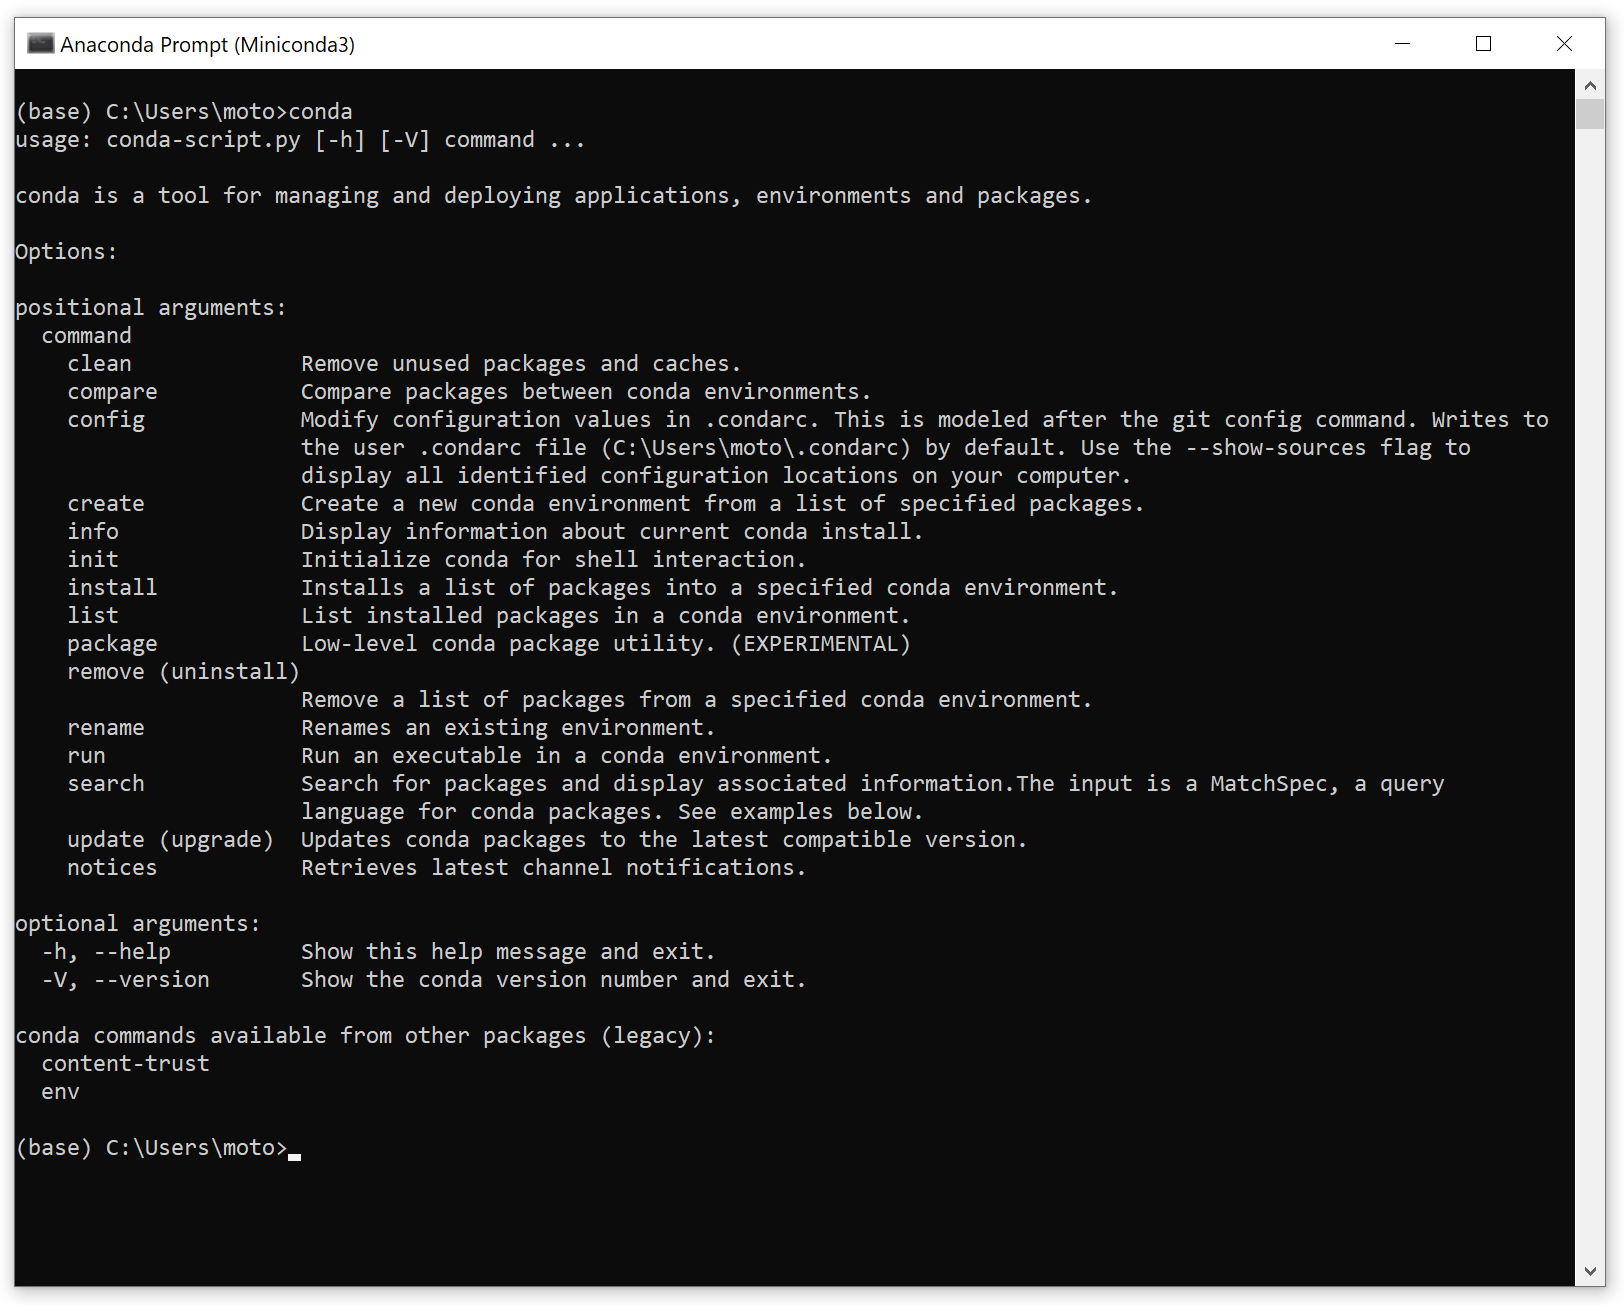
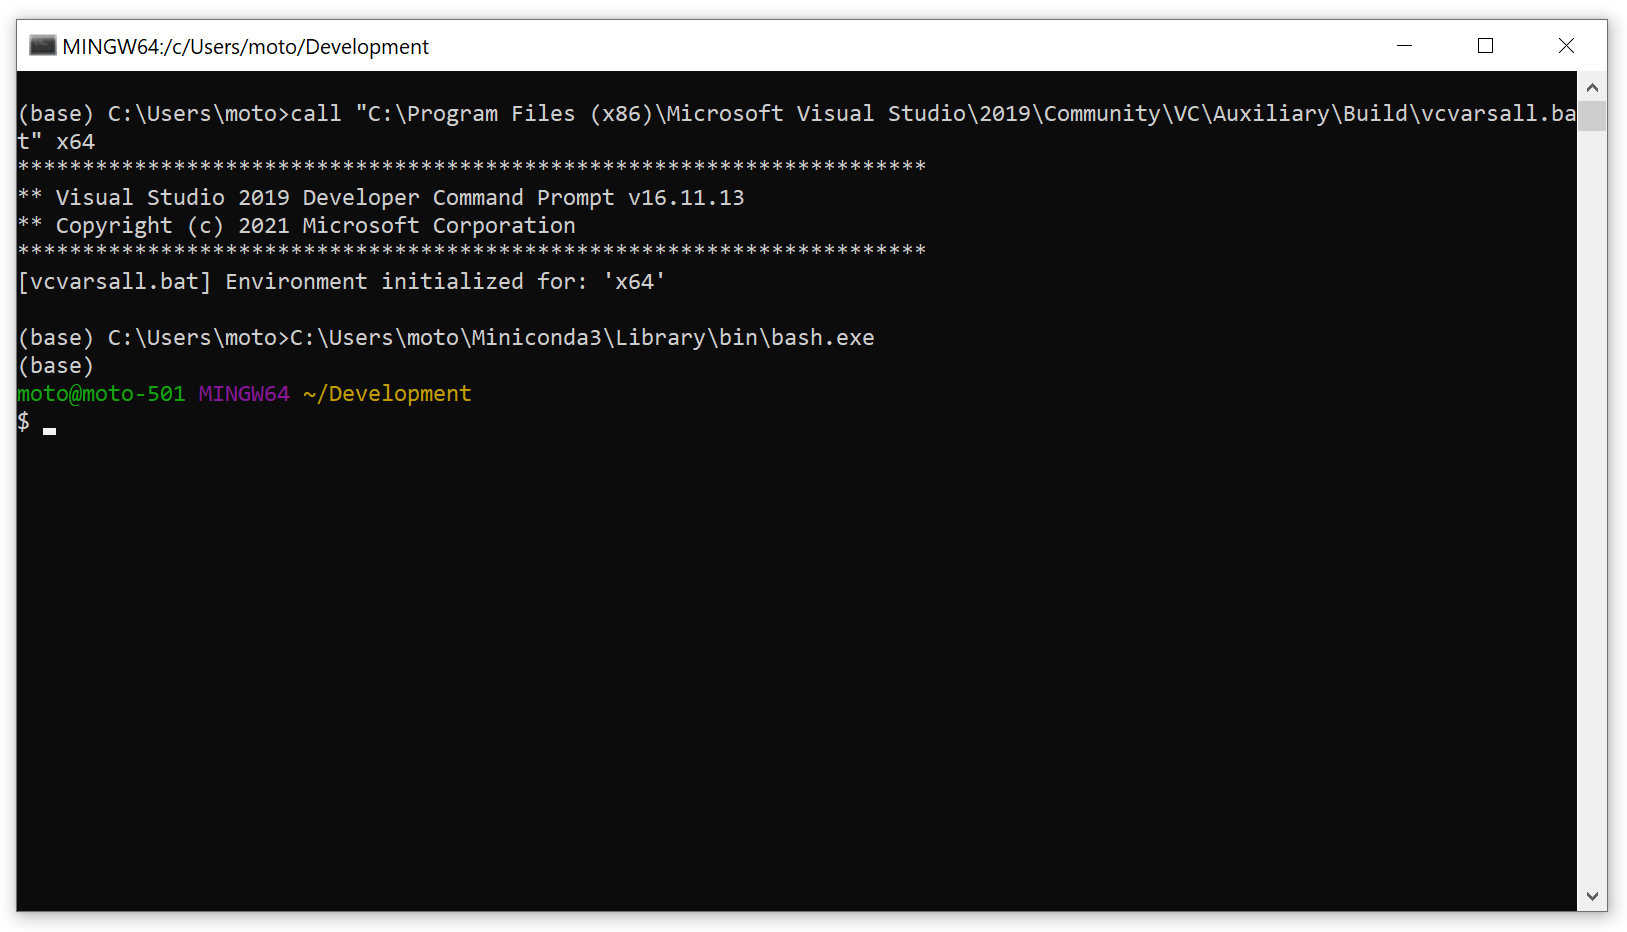
Activate dev tools by running the following command.
We need to use the MSVC x64 toolset for compilation. To enable the toolset, one can use
vcvarsall.batorvcvars64.batfile, which are found under Visual Studio’s installation folder, underVC\Auxiliary\Build\. More information are available at https://docs.microsoft.com/en-us/cpp/build/how-to-enable-a-64-bit-visual-cpp-toolset-on-the-command-line?view=msvc-160#use-vcvarsallbat-to-set-a-64-bit-hosted-build-architecturecall "C:\Program Files (x86)\Microsoft Visual Studio\2019\Community\VC\Auxiliary\Build\vcvarsall.bat" x64
Please makes sure that
clcommand is recognized.
[Optional] Launch bash with the following command.
If you want a similar UX as Linux/macOS, you can launch Bash. However, please note that in Bash environment, the file paths are different from native Windows style, and
torchaudio.datasetsmodule does not work.Miniconda3\Library\bin\bash.exe
3. Install PyTorch
Please refer to https://pytorch.org/get-started/locally/ for the up-to-date way to install PyTorch.
The following command installs the nightly build version of PyTorch.
# CPU-only
conda install pytorch cpuonly -c pytorch-nightly

# With CUDA support
conda install pytorch pytorch-cuda=11.7 -c pytorch-nightly -c nvidia
When installing CUDA-enabled version, it also install CUDA toolkit.
4. [Optional] cuDNN
If you intend to build CUDA-related features, please install cuDNN.
Download CuDNN from https://developer.nvidia.com/cudnn, and extract files in the same directories as CUDA toolkit.
When using conda, the directories are ${CONDA_PREFIX}/bin, ${CONDA_PREFIX}/include, ${CONDA_PREFIX}/Lib/x64.
5. Install external dependencies
conda install cmake ninja
6. Build TorchAudio
Now that we have everything ready, we can build TorchAudio.
git clone https://github.com/pytorch/audio
cd audio
# In Command Prompt
python setup.py develop
# In Bash
python setup.py develop
Note
Due to the complexity of build process, TorchAudio only supports in-place build.
To use pip, please use --no-use-pep517 option.
pip install -v -e . --no-use-pep517
[Optional] Build TorchAudio with a custom FFmpeg
By default, torchaudio tries to build FFmpeg extension with support for multiple FFmpeg versions. This process uses pre-built FFmpeg libraries compiled for specific CPU architectures like x86_64.
If your CPU is different, then the build process can fail. To workaround, one can disable FFmpeg integration (by setting the environment variable USE_FFMPEG=0) or switch to the single version FFmpeg extension.
To build single version FFmpeg extension, FFmpeg binaries must be provided by user and available in the build environment. To do so, install FFmpeg and set FFMPEG_ROOT environment variable to specify the location of FFmpeg.
conda install -c conda-forge ffmpeg
FFMPEG_ROOT=${CONDA_PREFIX}/Library python setup.py develop
[Optional] Building FFmpeg from source
The following section illustrates a way to build FFmpeg libraries from source.
Conda-forge’s FFmpeg package comes with support for major codecs and GPU decoders, so regular users and developers do not need to build FFmpeg from source.
If you are not using Conda, then you can either find a pre-built binary distribution or build FFmpeg by yourself.
Also, in case torchaudio developer needs to update and customize the CI for FFmpeg build, this section might be helpful.
1. Install MSYS2
To build FFmpeg in a way it is usable from the TorchAudio development environment, we need to build binaries native to MINGW64. To do so, we need tools required by FFmpeg’s build process, such as pkg-config and make, that work in MINGW64 environment. For this purpose, we use MSYS2.
FFmpeg’s official documentation touches this https://trac.ffmpeg.org/wiki/CompilationGuide/MinGW
Please follow the instruction at https://www.msys2.org/ to install MSYS2.
Note
In CI environment, often Chocolatery can be used to install MSYS2.
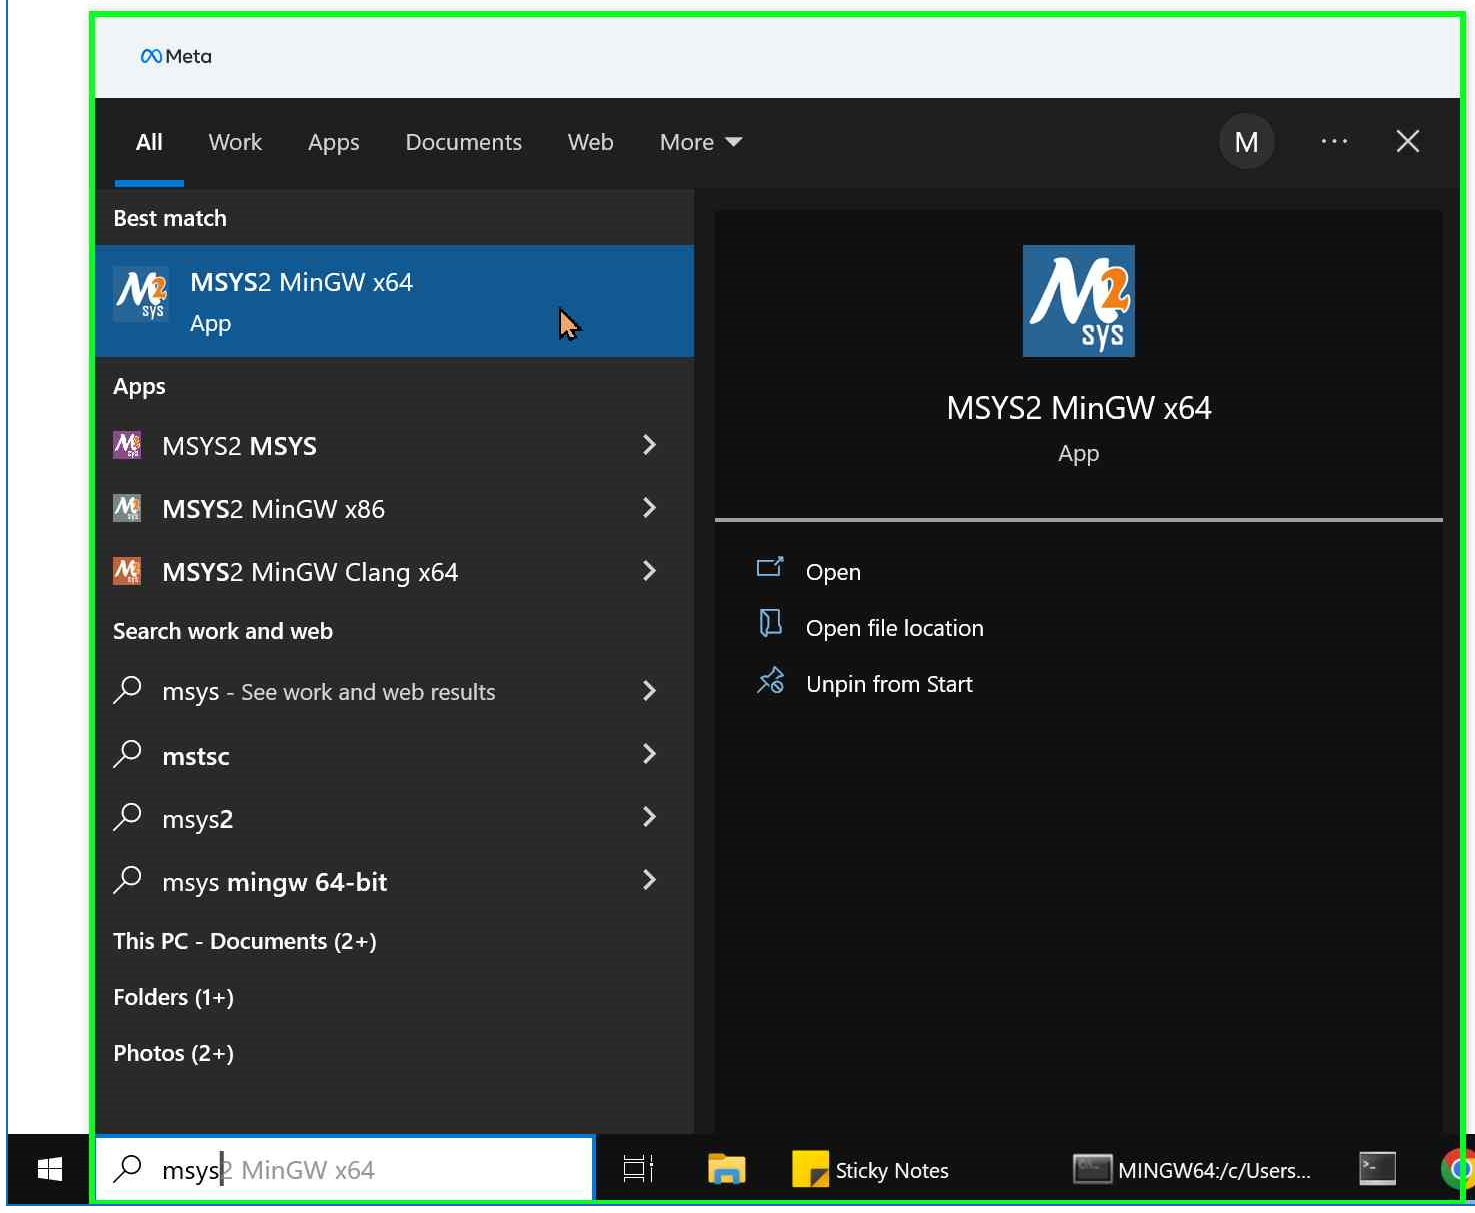
2. Launch MSYS2
Use the shortcut to launch MSYS2 (MINGW64).
Note
The Bash environment in MSYS2 does not play well with Conda env, so do not add Conda initialization script in ~/.bashrc of MSYS2 environment. (i.e. C:\msys2\home\USER\.bashrc) Instead, add it in C:\Users\USER\.bashrc)
3. Install build tools
$ pacman -S mingw-w64-x86_64-make
$ pacman -S mingw-w64-x86_64-yasm
After the installation, you should have packages similar to the following;
$ pacman -Qe
base 2020.12-1
base-devel 2022.01-2
filesystem 2023.01-2
mingw-w64-x86_64-make 4.3-1
mingw-w64-x86_64-pkgconf 1.8.0-2
mingw-w64-x86_64-yasm 1.3.0-4
msys2-runtime 3.4.3-5
4. Build FFmpeg
Check out FFmpeg source code.
git clone https://github.com/ffmpeg/ffmpeg
cd ffmpeg
git checkout <VERSION>
Build
./configure --toolchain=msvc
make -j
If the build succeeds, ffmpeg.exe should be found in the same directory. Make sure that you can run it.
5. Verify the build
Check that the resulting FFmpeg binary is accessible from Conda env
Now launch a new command prompt and enable the TorchAudio development environment. Make sure that you can run the ffmpeg.exe command generated in the previous step.
