Building an ExecuTorch Android Demo App
This is forked from PyTorch Android Demo App.
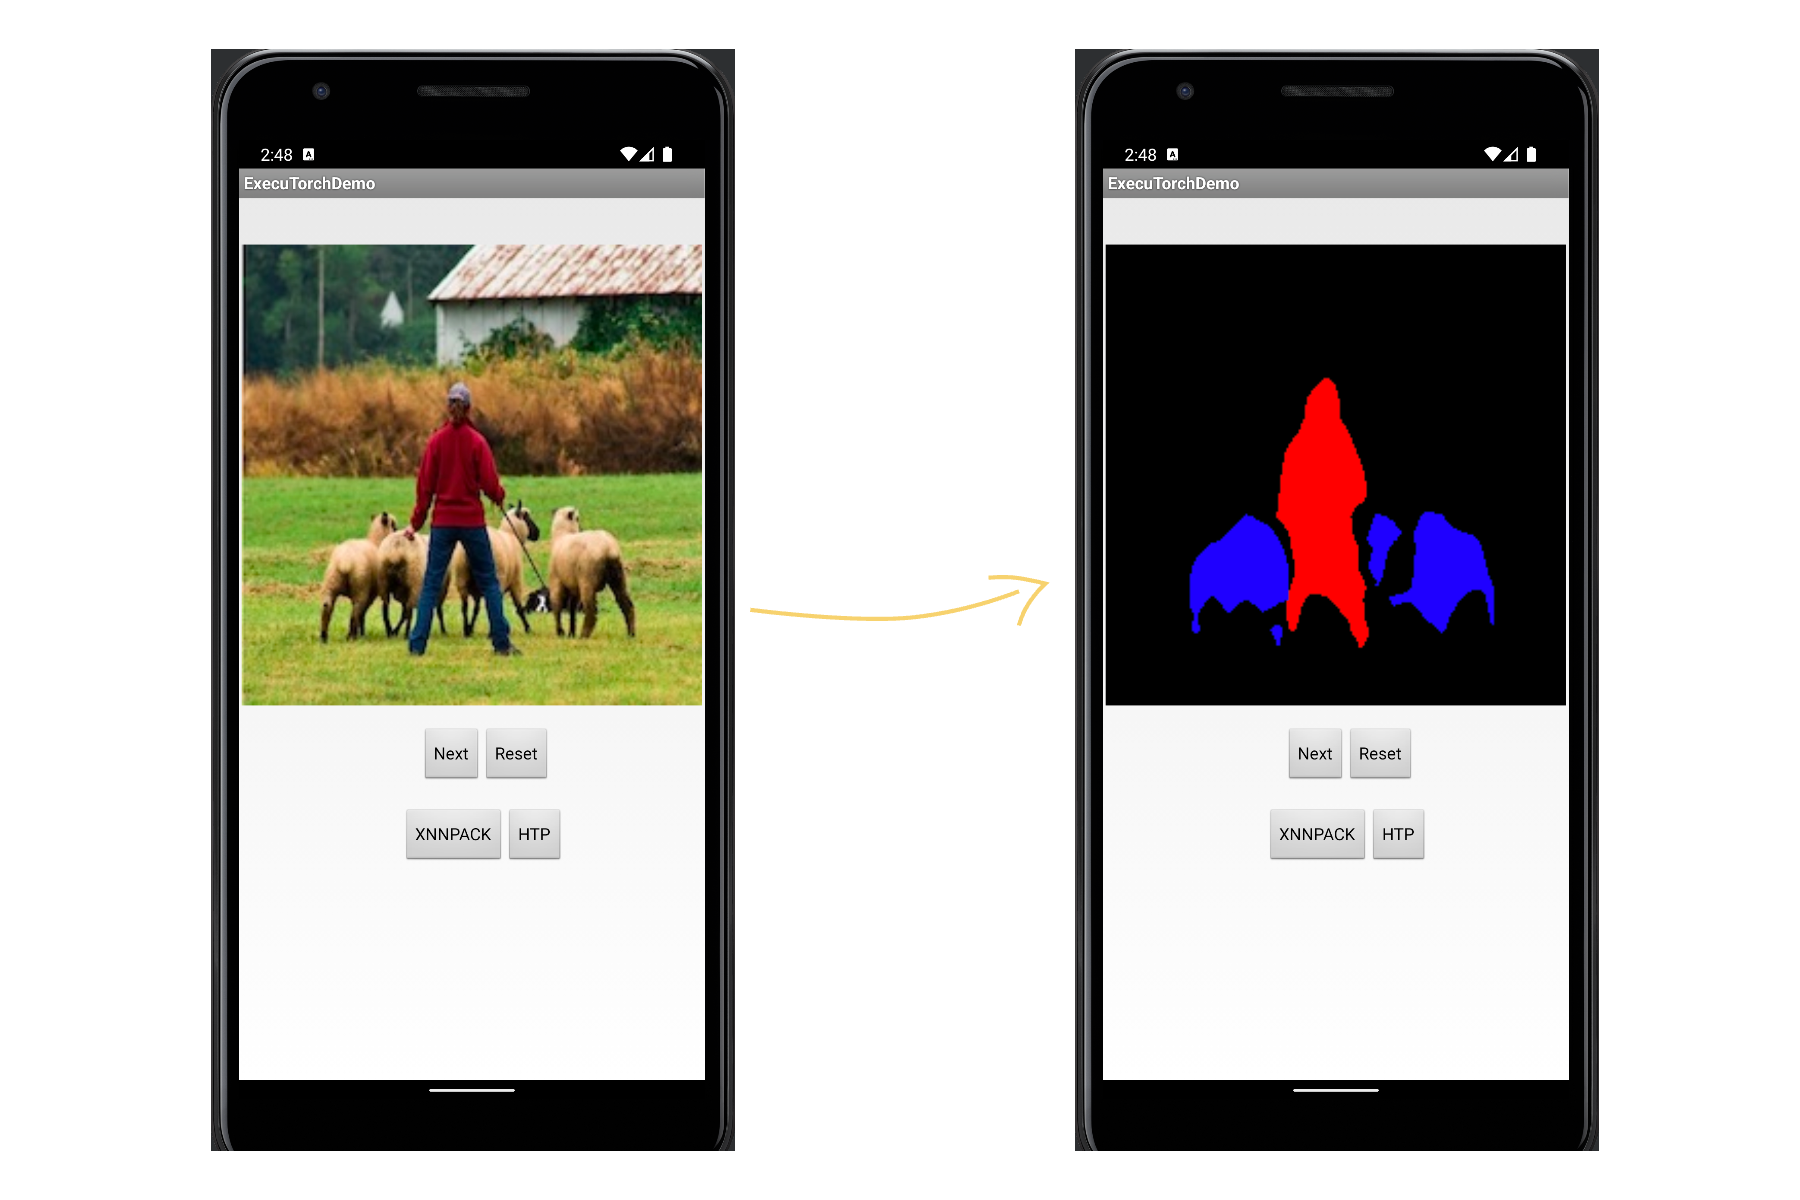
This guide explains how to setup ExecuTorch for Android using a demo app. The app employs a DeepLab v3 model for image segmentation tasks. Models are exported to ExecuTorch using XNNPACK FP32 backend.
How to set up a build target for Android arm64-v8a
How to build the required ExecuTorch runtime with JNI wrapper for Android
How to build the app with required JNI library and model file
Refer to Setting up ExecuTorch to set up the repo and dev environment.
Download and install Android Studio and SDK.
Supported Host OS: CentOS, macOS Ventura (M1/x86_64). See below for Qualcomm HTP specific requirements.
Qualcomm HTP Only1: To build and run on Qualcomm’s AI Engine Direct, please follow Building and Running ExecuTorch with Qualcomm AI Engine Direct Backend for hardware and software pre-requisites. The version we use for this tutorial is 2.19. The chip we use for this tutorial is SM8450.
Note
This demo app and tutorial has only been validated with arm64-v8a ABI.
Build
Ahead-Of-Time
We generate the model file for the ExecuTorch runtime in Android Demo App.
XNNPACK Delegation
For delegating DeepLab v3 to XNNPACK backend, please do the following to export the model:
python3 -m examples.xnnpack.aot_compiler --model_name="dl3" --delegate
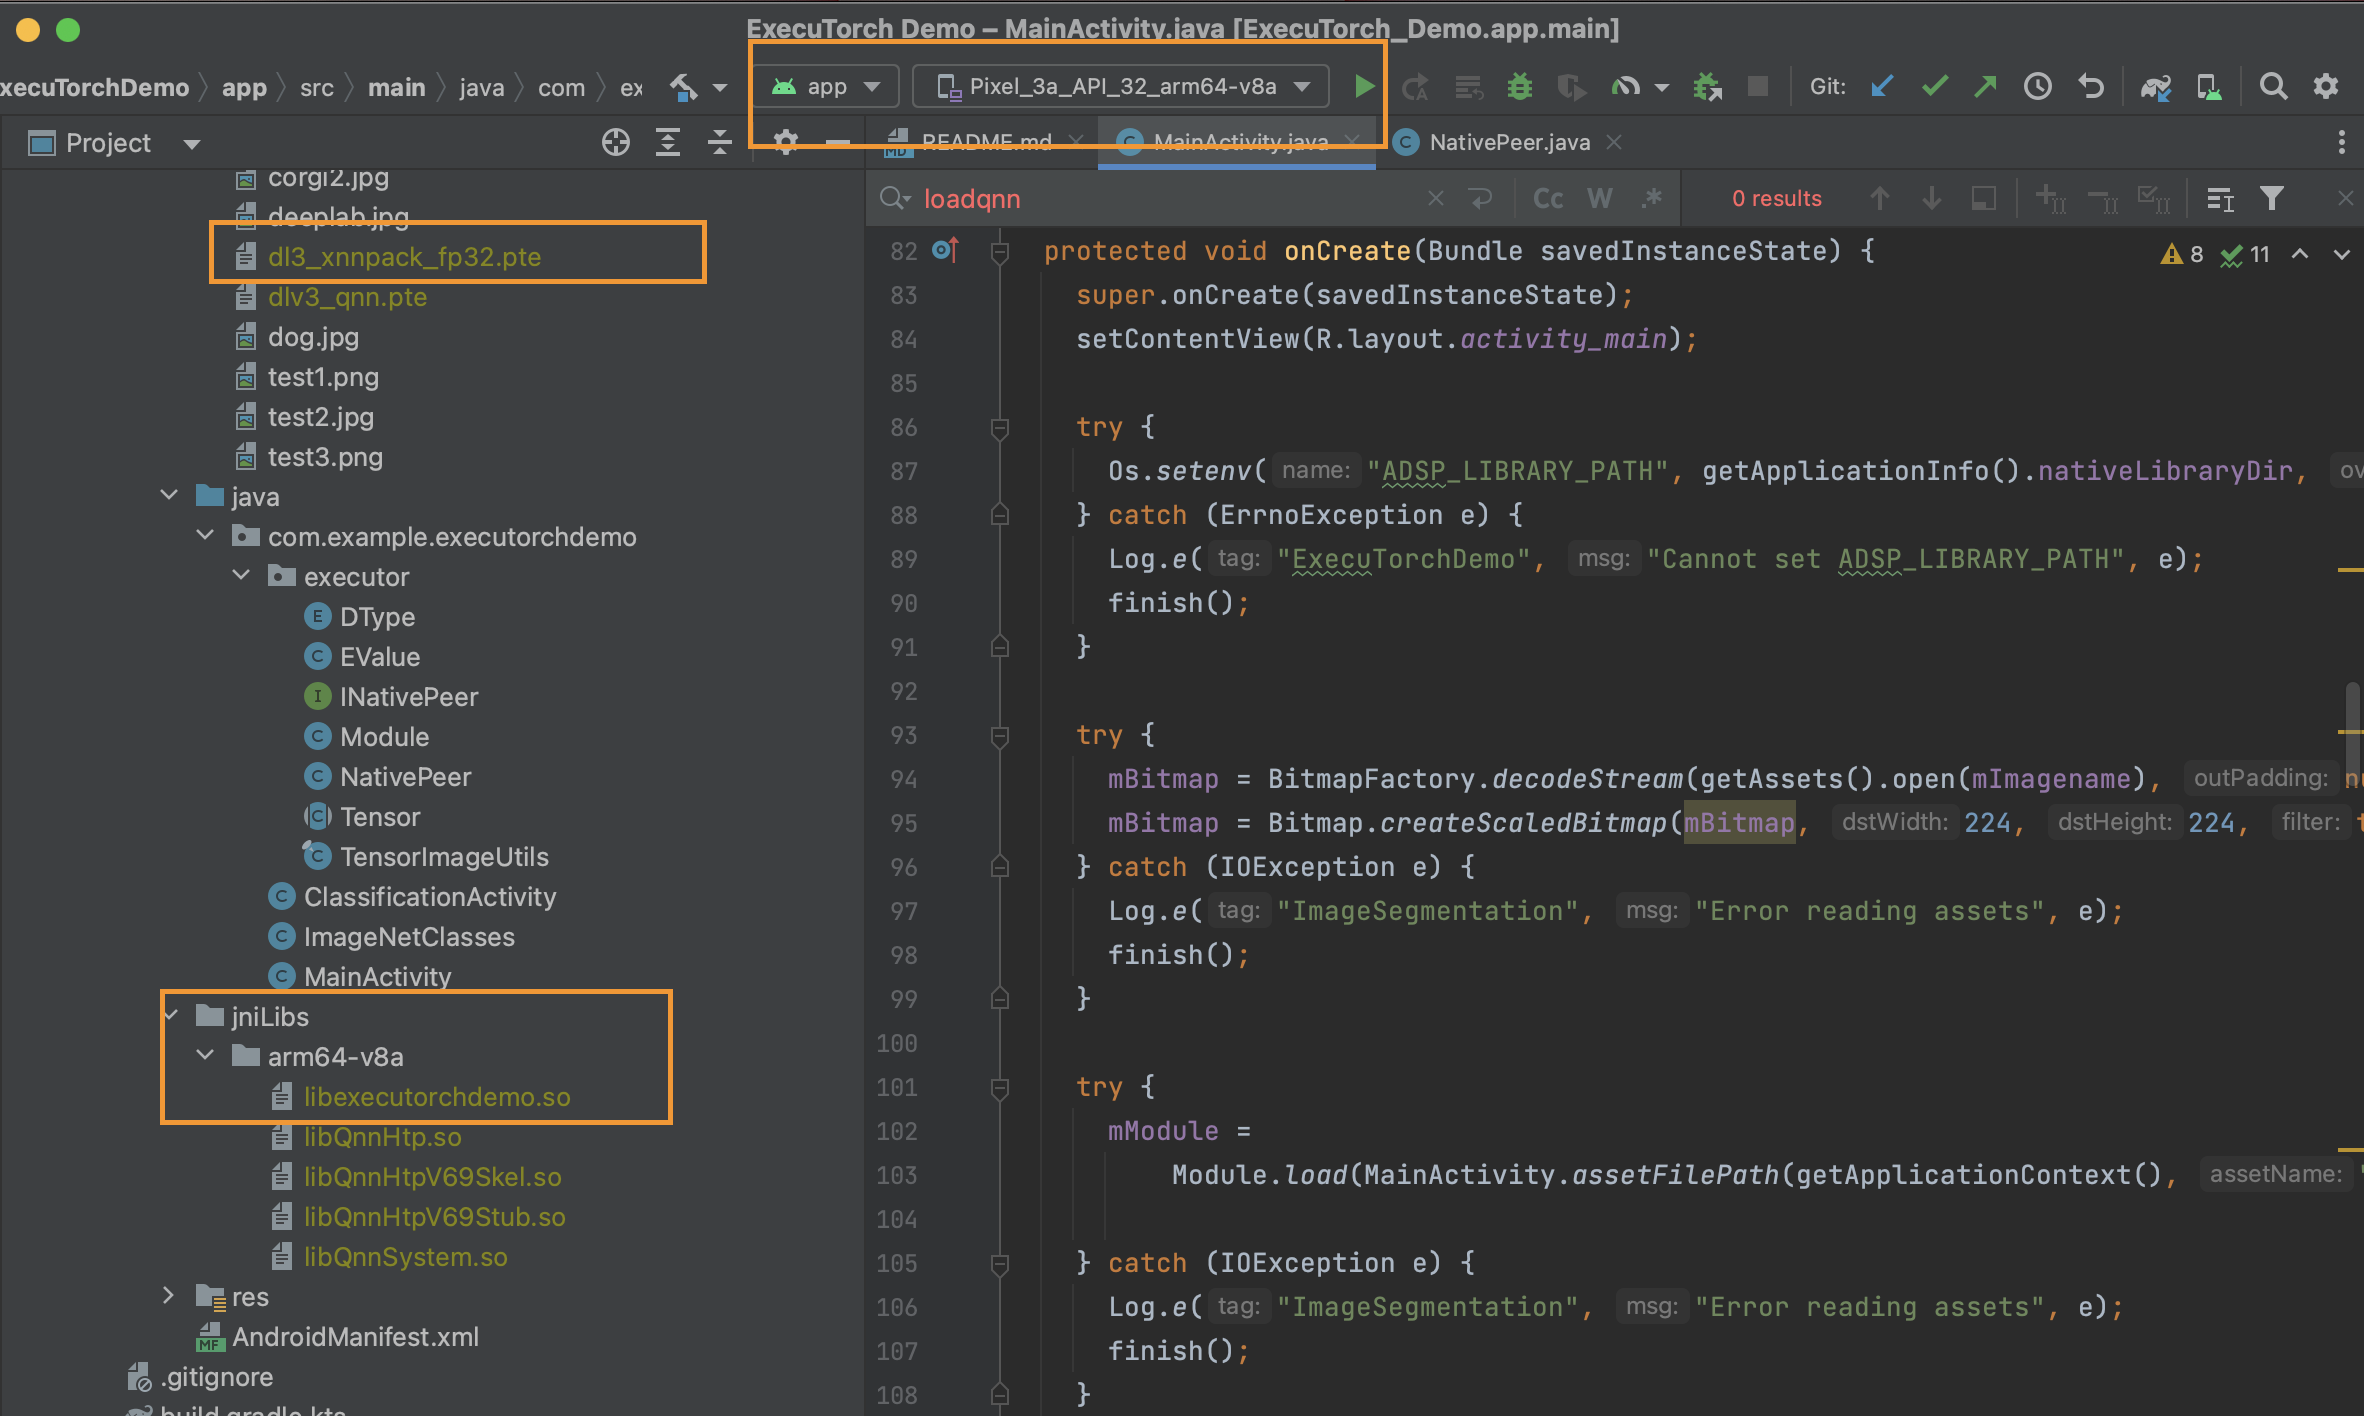
mkdir -p examples/demo-apps/android/ExecuTorchDemo/app/src/main/assets/
cp dl3_xnnpack_fp32.pte examples/demo-apps/android/ExecuTorchDemo/app/src/main/assets/
For more detailed tutorial of lowering to XNNPACK, please see XNNPACK backend.
Qualcomm Hexagon NPU
For delegating to Qualcomm Hexagon NPU, please follow the tutorial here.
After generating the model, copy the model to assets directory.
python -m examples.qualcomm.scripts.deeplab_v3 -b build-android -m SM8450 -s <adb_connected_device_serial>
cp deeplab_v3/dlv3_qnn.pte examples/demo-apps/android/ExecuTorchDemo/app/src/main/assets/
Runtime
We build the required ExecuTorch runtime library to run the model.
XNNPACK
Build the CMake target for the library with XNNPACK backend:
export ANDROID_NDK=<path-to-android-ndk>
export ANDROID_ABI=arm64-v8a

# Run the following lines from the `executorch/` folder
./install_requirements.sh --clean
mkdir cmake-android-out

# Build the core executorch library
cmake . -DCMAKE_INSTALL_PREFIX=cmake-android-out \
  -DCMAKE_TOOLCHAIN_FILE="${ANDROID_NDK}/build/cmake/android.toolchain.cmake" \
  -DANDROID_ABI="${ANDROID_ABI}" \
  -DEXECUTORCH_BUILD_XNNPACK=ON \
  -DEXECUTORCH_BUILD_EXTENSION_DATA_LOADER=ON \
  -DEXECUTORCH_BUILD_EXTENSION_MODULE=ON \
  -DEXECUTORCH_BUILD_EXTENSION_RUNNER_UTIL=ON \
  -DEXECUTORCH_BUILD_EXTENSION_TENSOR=ON \
  -Bcmake-android-out

cmake --build cmake-android-out -j16 --target install
When we set EXECUTORCH_BUILD_XNNPACK=ON, we will build the target xnnpack_backend which in turn is linked into libexecutorch_jni via CMake.
Build the Android extension:
# Build the android extension
cmake extension/android \
  -DCMAKE_TOOLCHAIN_FILE="${ANDROID_NDK}"/build/cmake/android.toolchain.cmake \
  -DANDROID_ABI="${ANDROID_ABI}" \
  -DCMAKE_INSTALL_PREFIX=cmake-android-out \
  -Bcmake-android-out/extension/android

cmake --build cmake-android-out/extension/android -j16
libexecutorch_jni.so wraps up the required XNNPACK Backend runtime library from xnnpack_backend, and adds an additional JNI layer using fbjni. This is later exposed to Java app.
Qualcomm Hexagon NPU
Build the CMake target for the library with Qualcomm Hexagon NPU (HTP) backend (XNNPACK also included):
export ANDROID_NDK=<path-to-android-ndk>
export ANDROID_ABI=arm64-v8a
export QNN_SDK_ROOT=<path-to-qnn-sdk>

./install_requirements.sh --clean
mkdir cmake-android-out
cmake . -DCMAKE_INSTALL_PREFIX=cmake-android-out \
    -DCMAKE_TOOLCHAIN_FILE="${ANDROID_NDK}/build/cmake/android.toolchain.cmake" \
    -DANDROID_ABI="${ANDROID_ABI}" \
    -DEXECUTORCH_BUILD_XNNPACK=ON \
    -DEXECUTORCH_BUILD_QNN=ON \
    -DQNN_SDK_ROOT="${QNN_SDK_ROOT}" \
    -DEXECUTORCH_BUILD_EXTENSION_DATA_LOADER=ON \
    -DEXECUTORCH_BUILD_EXTENSION_MODULE=ON \
    -DEXECUTORCH_BUILD_EXTENSION_RUNNER_UTIL=ON \
    -DEXECUTORCH_BUILD_EXTENSION_TENSOR=ON \
    -Bcmake-android-out

cmake --build cmake-android-out -j16 --target install
Similar to the XNNPACK library, with this setup, we compile libexecutorch_jni.so but it adds an additional static library qnn_executorch_backend which wraps up Qualcomm HTP runtime library and registers the Qualcomm HTP backend. This is later exposed to Java app.
qnn_executorch_backend is built when we turn on CMake option EXECUTORCH_BUILD_QNN. It will include the CMakeLists.txt from backends/qualcomm where we add_library(qnn_executorch_backend STATIC).
Build the Android extension:
cmake extension/android \
  -DCMAKE_TOOLCHAIN_FILE="${ANDROID_NDK}"/build/cmake/android.toolchain.cmake \
  -DANDROID_ABI="${ANDROID_ABI}" \
  -DCMAKE_INSTALL_PREFIX=cmake-android-out \
  -Bcmake-android-out/extension/android

cmake --build cmake-android-out/extension/android -j16
Deploying on Device via Demo App
Steps for Deploying Model via XNNPACK
mkdir -p examples/demo-apps/android/ExecuTorchDemo/app/src/main/jniLibs/arm64-v8a
cp cmake-android-out/extension/android/libexecutorch_jni.so \
   examples/demo-apps/android/ExecuTorchDemo/app/src/main/jniLibs/arm64-v8a/libexecutorch.so
This allows the Android app to load ExecuTorch runtime with XNNPACK backend as a JNI library. Later, this shared library will be loaded by NativePeer.java in Java code.
Steps for Deploying Model via Qualcomm’s AI Engine Direct
mkdir -p ../examples/demo-apps/android/ExecuTorchDemo/app/src/main/jniLibs/arm64-v8a
We need to push some additional Qualcomm HTP backend libraries to the app. Please refer to Qualcomm docs here.
cp ${QNN_SDK_ROOT}/lib/aarch64-android/libQnnHtp.so ${QNN_SDK_ROOT}/lib/hexagon-v69/unsigned/libQnnHtpV69Skel.so ${QNN_SDK_ROOT}/lib/aarch64-android/libQnnHtpV69Stub.so ${QNN_SDK_ROOT}/lib/aarch64-android/libQnnSystem.so \
   examples/demo-apps/android/ExecuTorchDemo/app/src/main/jniLibs/arm64-v8a
Copy the core libraries:
cp cmake-android-out/extension/android/libexecutorch_jni.so \
   examples/demo-apps/android/ExecuTorchDemo/app/src/main/jniLibs/arm64-v8a/libexecutorch.so
cp cmake-android-out/lib/libqnn_executorch_backend.so \
   examples/demo-apps/android/ExecuTorchDemo/app/src/main/jniLibs/arm64-v8a/libqnn_executorch_backend.so
Running the App
Open the project
examples/demo-apps/android/ExecuTorchDemowith Android Studio.Run the app (^R).
On the phone or emulator, you can try running the model: