Note
Click here to download the full example code
StreamReader Advanced Usages
Author: Moto Hira
This tutorial is the continuation of StreamReader Basic Usages.
This shows how to use StreamReader for
Device inputs, such as microphone, webcam and screen recording
Generating synthetic audio / video
Applying preprocessing with custom filter expressions
import torch
import torchaudio

print(torch.__version__)
print(torchaudio.__version__)
2.0.0
2.0.1
try:
    from torchaudio.io import StreamReader
except ModuleNotFoundError:
    try:
        import google.colab

        print(
            """
            To enable running this notebook in Google Colab, install the requisite
            third party libraries by running the following code:

            !add-apt-repository -y ppa:savoury1/ffmpeg4
            !apt-get -qq install -y ffmpeg
            """
        )
    except ModuleNotFoundError:
        pass
    raise

import IPython
import matplotlib.pyplot as plt

base_url = "https://download.pytorch.org/torchaudio/tutorial-assets"
AUDIO_URL = f"{base_url}/Lab41-SRI-VOiCES-src-sp0307-ch127535-sg0042.wav"
VIDEO_URL = f"{base_url}/stream-api/NASAs_Most_Scientifically_Complex_Space_Observatory_Requires_Precision-MP4.mp4"
Audio / Video device input
See also
Given that the system has proper media devices and libavdevice is configured to use the devices, the streaming API can pull media streams from these devices.
To do this, we pass additional parameters format and option
to the constructor. format specifies the device component and
option dictionary is specific to the specified component.
The exact arguments to be passed depend on the system configuration. Please refer to https://ffmpeg.org/ffmpeg-devices.html for the detail.
The following example illustrates how one can do this on MacBook Pro.
First, we need to check the available devices.
$ ffmpeg -f avfoundation -list_devices true -i ""
[AVFoundation indev @ 0x143f04e50] AVFoundation video devices:
[AVFoundation indev @ 0x143f04e50] [0] FaceTime HD Camera
[AVFoundation indev @ 0x143f04e50] [1] Capture screen 0
[AVFoundation indev @ 0x143f04e50] AVFoundation audio devices:
[AVFoundation indev @ 0x143f04e50] [0] MacBook Pro Microphone
We use FaceTime HD Camera as video device (index 0) and MacBook Pro Microphone as audio device (index 0).
If we do not pass any option, the device uses its default
configuration. The decoder might not support the configuration.
>>> StreamReader(
...     src="0:0",  # The first 0 means `FaceTime HD Camera`, and
...                 # the second 0 indicates `MacBook Pro Microphone`.
...     format="avfoundation",
... )
[avfoundation @ 0x125d4fe00] Selected framerate (29.970030) is not supported by the device.
[avfoundation @ 0x125d4fe00] Supported modes:
[avfoundation @ 0x125d4fe00]   1280x720@[1.000000 30.000000]fps
[avfoundation @ 0x125d4fe00]   640x480@[1.000000 30.000000]fps
Traceback (most recent call last):
  File "<stdin>", line 1, in <module>
  ...
RuntimeError: Failed to open the input: 0:0
By providing option, we can change the format that the device
streams to a format supported by decoder.
>>> streamer = StreamReader(
...     src="0:0",
...     format="avfoundation",
...     option={"framerate": "30", "pixel_format": "bgr0"},
... )
>>> for i in range(streamer.num_src_streams):
...     print(streamer.get_src_stream_info(i))
SourceVideoStream(media_type='video', codec='rawvideo', codec_long_name='raw video', format='bgr0', bit_rate=0, width=640, height=480, frame_rate=30.0)
SourceAudioStream(media_type='audio', codec='pcm_f32le', codec_long_name='PCM 32-bit floating point little-endian', format='flt', bit_rate=3072000, sample_rate=48000.0, num_channels=2)
Synthetic source streams
As a part of device integration, ffmpeg provides a “virtual device” interface. This interface provides synthetic audio / video data generation using libavfilter.
To use this, we set format=lavfi and provide a filter description
to src.
The detail of filter description can be found at https://ffmpeg.org/ffmpeg-filters.html
Audio Examples
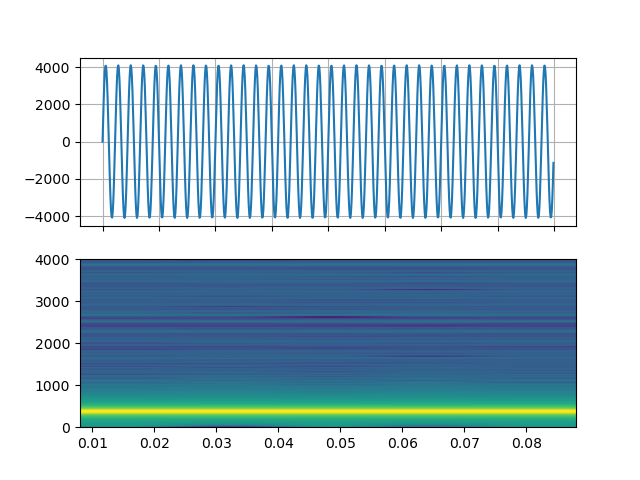
Sine wave
https://ffmpeg.org/ffmpeg-filters.html#sine
StreamReader(src="sine=sample_rate=8000:frequency=360", format="lavfi")
Signal with arbitral expression
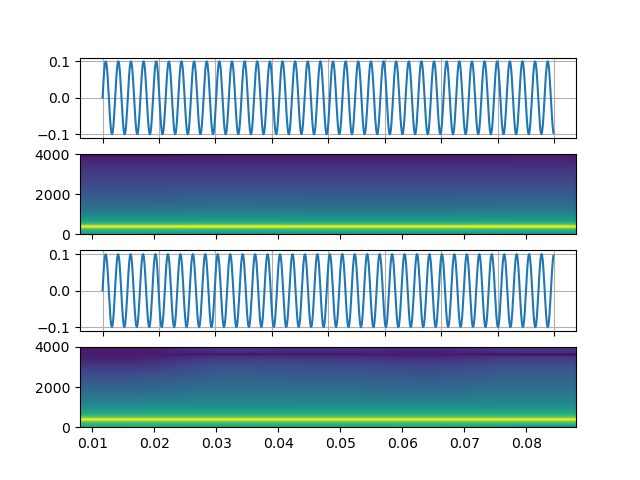
https://ffmpeg.org/ffmpeg-filters.html#aevalsrc
# 5 Hz binaural beats on a 360 Hz carrier
StreamReader(
    src=(
        'aevalsrc='
        'sample_rate=8000:'
        'exprs=0.1*sin(2*PI*(360-5/2)*t)|0.1*sin(2*PI*(360+5/2)*t)'
    ),
    format='lavfi',
 )
Noise
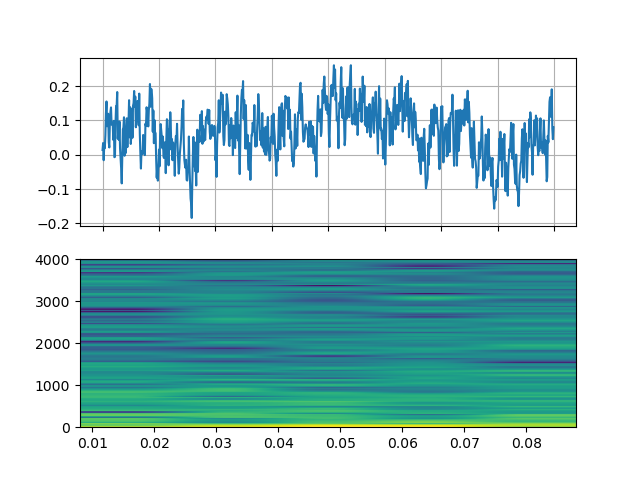
https://ffmpeg.org/ffmpeg-filters.html#anoisesrc
StreamReader(src="anoisesrc=color=pink:sample_rate=8000:amplitude=0.5", format="lavfi")
Video Examples
Cellular automaton
https://ffmpeg.org/ffmpeg-filters.html#cellauto
StreamReader(src=f"cellauto", format="lavfi")
Mandelbrot
https://ffmpeg.org/ffmpeg-filters.html#cellauto
StreamReader(src=f"mandelbrot", format="lavfi")
MPlayer Test patterns
https://ffmpeg.org/ffmpeg-filters.html#mptestsrc
StreamReader(src=f"mptestsrc", format="lavfi")
John Conway’s life game
https://ffmpeg.org/ffmpeg-filters.html#life
StreamReader(src=f"life", format="lavfi")
Sierpinski carpet/triangle fractal
https://ffmpeg.org/ffmpeg-filters.html#sierpinski
StreamReader(src=f"sierpinski", format="lavfi")
Custom filters
When defining an output stream, you can use
add_audio_stream() and
add_video_stream() methods.
These methods take filter_desc argument, which is a string
formatted according to ffmpeg’s
filter expression.
The difference between add_basic_(audio|video)_stream and
add_(audio|video)_stream is that add_basic_(audio|video)_stream
constructs the filter expression and passes it to the same underlying
implementation. Everything add_basic_(audio|video)_stream can be
achieved with add_(audio|video)_stream.
Note
When applying custom filters, the client code must convert the audio/video stream to one of the formats that torchaudio can convert to tensor format. This can be achieved, for example, by applying
format=pix_fmts=rgb24to video stream andaformat=sample_fmts=fltpto audio stream.Each output stream has separate filter graph. Therefore, it is not possible to use different input/output streams for a filter expression. However, it is possible to split one input stream into multiple of them, and merge them later.
Audio Examples
# fmt: off
descs = [
    # No filtering
    "anull",
    # Apply a highpass filter then a lowpass filter
    "highpass=f=200,lowpass=f=1000",
    # Manipulate spectrogram
    (
        "afftfilt="
        "real='hypot(re,im)*sin(0)':"
        "imag='hypot(re,im)*cos(0)':"
        "win_size=512:"
        "overlap=0.75"
    ),
    # Manipulate spectrogram
    (
        "afftfilt="
        "real='hypot(re,im)*cos((random(0)*2-1)*2*3.14)':"
        "imag='hypot(re,im)*sin((random(1)*2-1)*2*3.14)':"
        "win_size=128:"
        "overlap=0.8"
    ),
]
# fmt: on
sample_rate = 8000

streamer = StreamReader(AUDIO_URL)
for desc in descs:
    streamer.add_audio_stream(
        frames_per_chunk=40000,
        filter_desc=f"aresample={sample_rate},{desc},aformat=sample_fmts=fltp",
    )

chunks = next(streamer.stream())


def _display(i):
    print("filter_desc:", streamer.get_out_stream_info(i).filter_description)
    _, axs = plt.subplots(2, 1)
    waveform = chunks[i][:, 0]
    axs[0].plot(waveform)
    axs[0].grid(True)
    axs[0].set_ylim([-1, 1])
    plt.setp(axs[0].get_xticklabels(), visible=False)
    axs[1].specgram(waveform, Fs=sample_rate)
    return IPython.display.Audio(chunks[i].T, rate=sample_rate)
Original
_display(0)
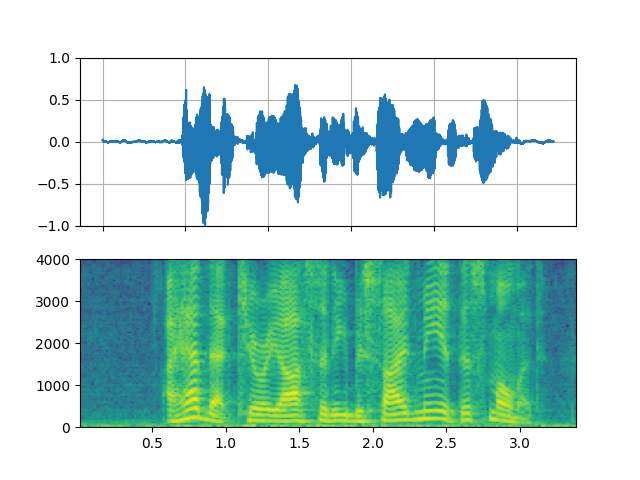
filter_desc: aresample=8000,anull,aformat=sample_fmts=fltp
Highpass / lowpass filter
_display(1)
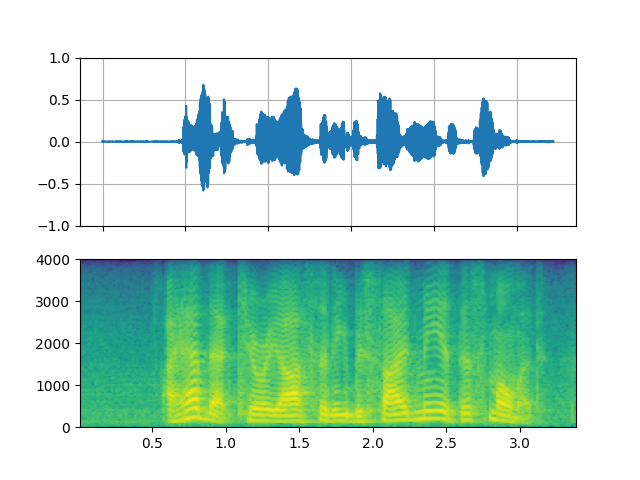
filter_desc: aresample=8000,highpass=f=200,lowpass=f=1000,aformat=sample_fmts=fltp
FFT filter - Robot 🤖
_display(2)
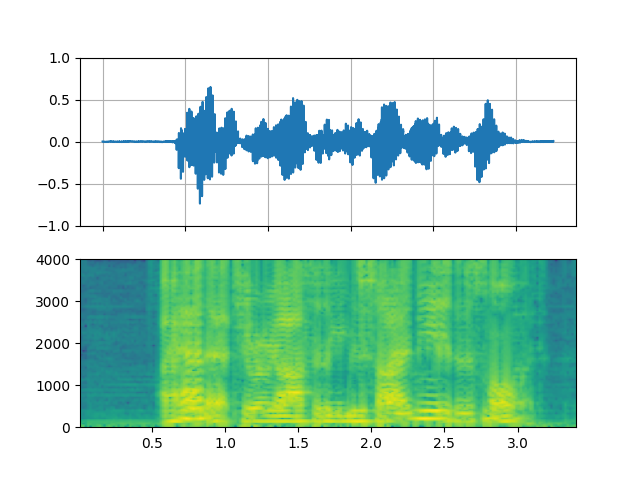
filter_desc: aresample=8000,afftfilt=real='hypot(re,im)*sin(0)':imag='hypot(re,im)*cos(0)':win_size=512:overlap=0.75,aformat=sample_fmts=fltp
FFT filter - Whisper
_display(3)
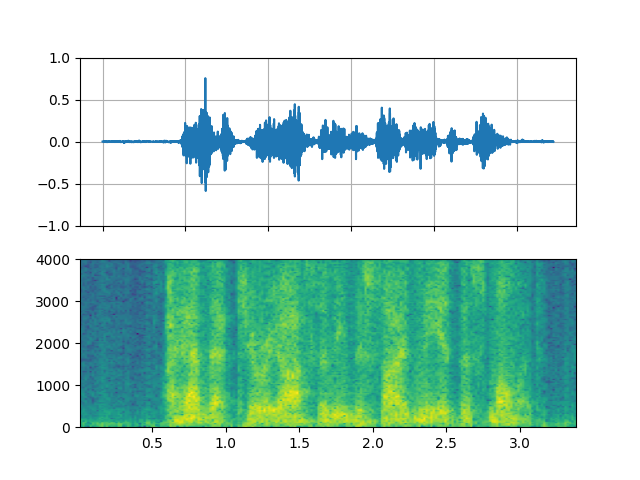
filter_desc: aresample=8000,afftfilt=real='hypot(re,im)*cos((random(0)*2-1)*2*3.14)':imag='hypot(re,im)*sin((random(1)*2-1)*2*3.14)':win_size=128:overlap=0.8,aformat=sample_fmts=fltp
Video Examples
# fmt: off
descs = [
    # No effect
    "null",
    # Split the input stream and apply horizontal flip to the right half.
    (
        "split [main][tmp];"
        "[tmp] crop=iw/2:ih:0:0, hflip [flip];"
        "[main][flip] overlay=W/2:0"
    ),
    # Edge detection
    "edgedetect=mode=canny",
    # Rotate image by randomly and fill the background with brown
    "rotate=angle=-random(1)*PI:fillcolor=brown",
    # Manipulate pixel values based on the coordinate
    "geq=r='X/W*r(X,Y)':g='(1-X/W)*g(X,Y)':b='(H-Y)/H*b(X,Y)'"
]
# fmt: on
streamer = StreamReader(VIDEO_URL)
for desc in descs:
    streamer.add_video_stream(
        frames_per_chunk=30,
        filter_desc=f"fps=10,{desc},format=pix_fmts=rgb24",
    )

streamer.seek(12)

chunks = next(streamer.stream())


def _display(i):
    print("filter_desc:", streamer.get_out_stream_info(i).filter_description)
    _, axs = plt.subplots(1, 3, figsize=(8, 1.9))
    chunk = chunks[i]
    for j in range(3):
        axs[j].imshow(chunk[10 * j + 1].permute(1, 2, 0))
        axs[j].set_axis_off()
    plt.tight_layout()
    plt.show(block=False)
Original
_display(0)

filter_desc: fps=10,null,format=pix_fmts=rgb24
Mirror
_display(1)

filter_desc: fps=10,split [main][tmp];[tmp] crop=iw/2:ih:0:0, hflip [flip];[main][flip] overlay=W/2:0,format=pix_fmts=rgb24
Edge detection
_display(2)

filter_desc: fps=10,edgedetect=mode=canny,format=pix_fmts=rgb24
Random rotation
_display(3)

filter_desc: fps=10,rotate=angle=-random(1)*PI:fillcolor=brown,format=pix_fmts=rgb24
Pixel manipulation
_display(4)

filter_desc: fps=10,geq=r='X/W*r(X,Y)':g='(1-X/W)*g(X,Y)':b='(H-Y)/H*b(X,Y)',format=pix_fmts=rgb24
Tag: torchaudio.io
Total running time of the script: ( 0 minutes 20.474 seconds)


