Overview
Note
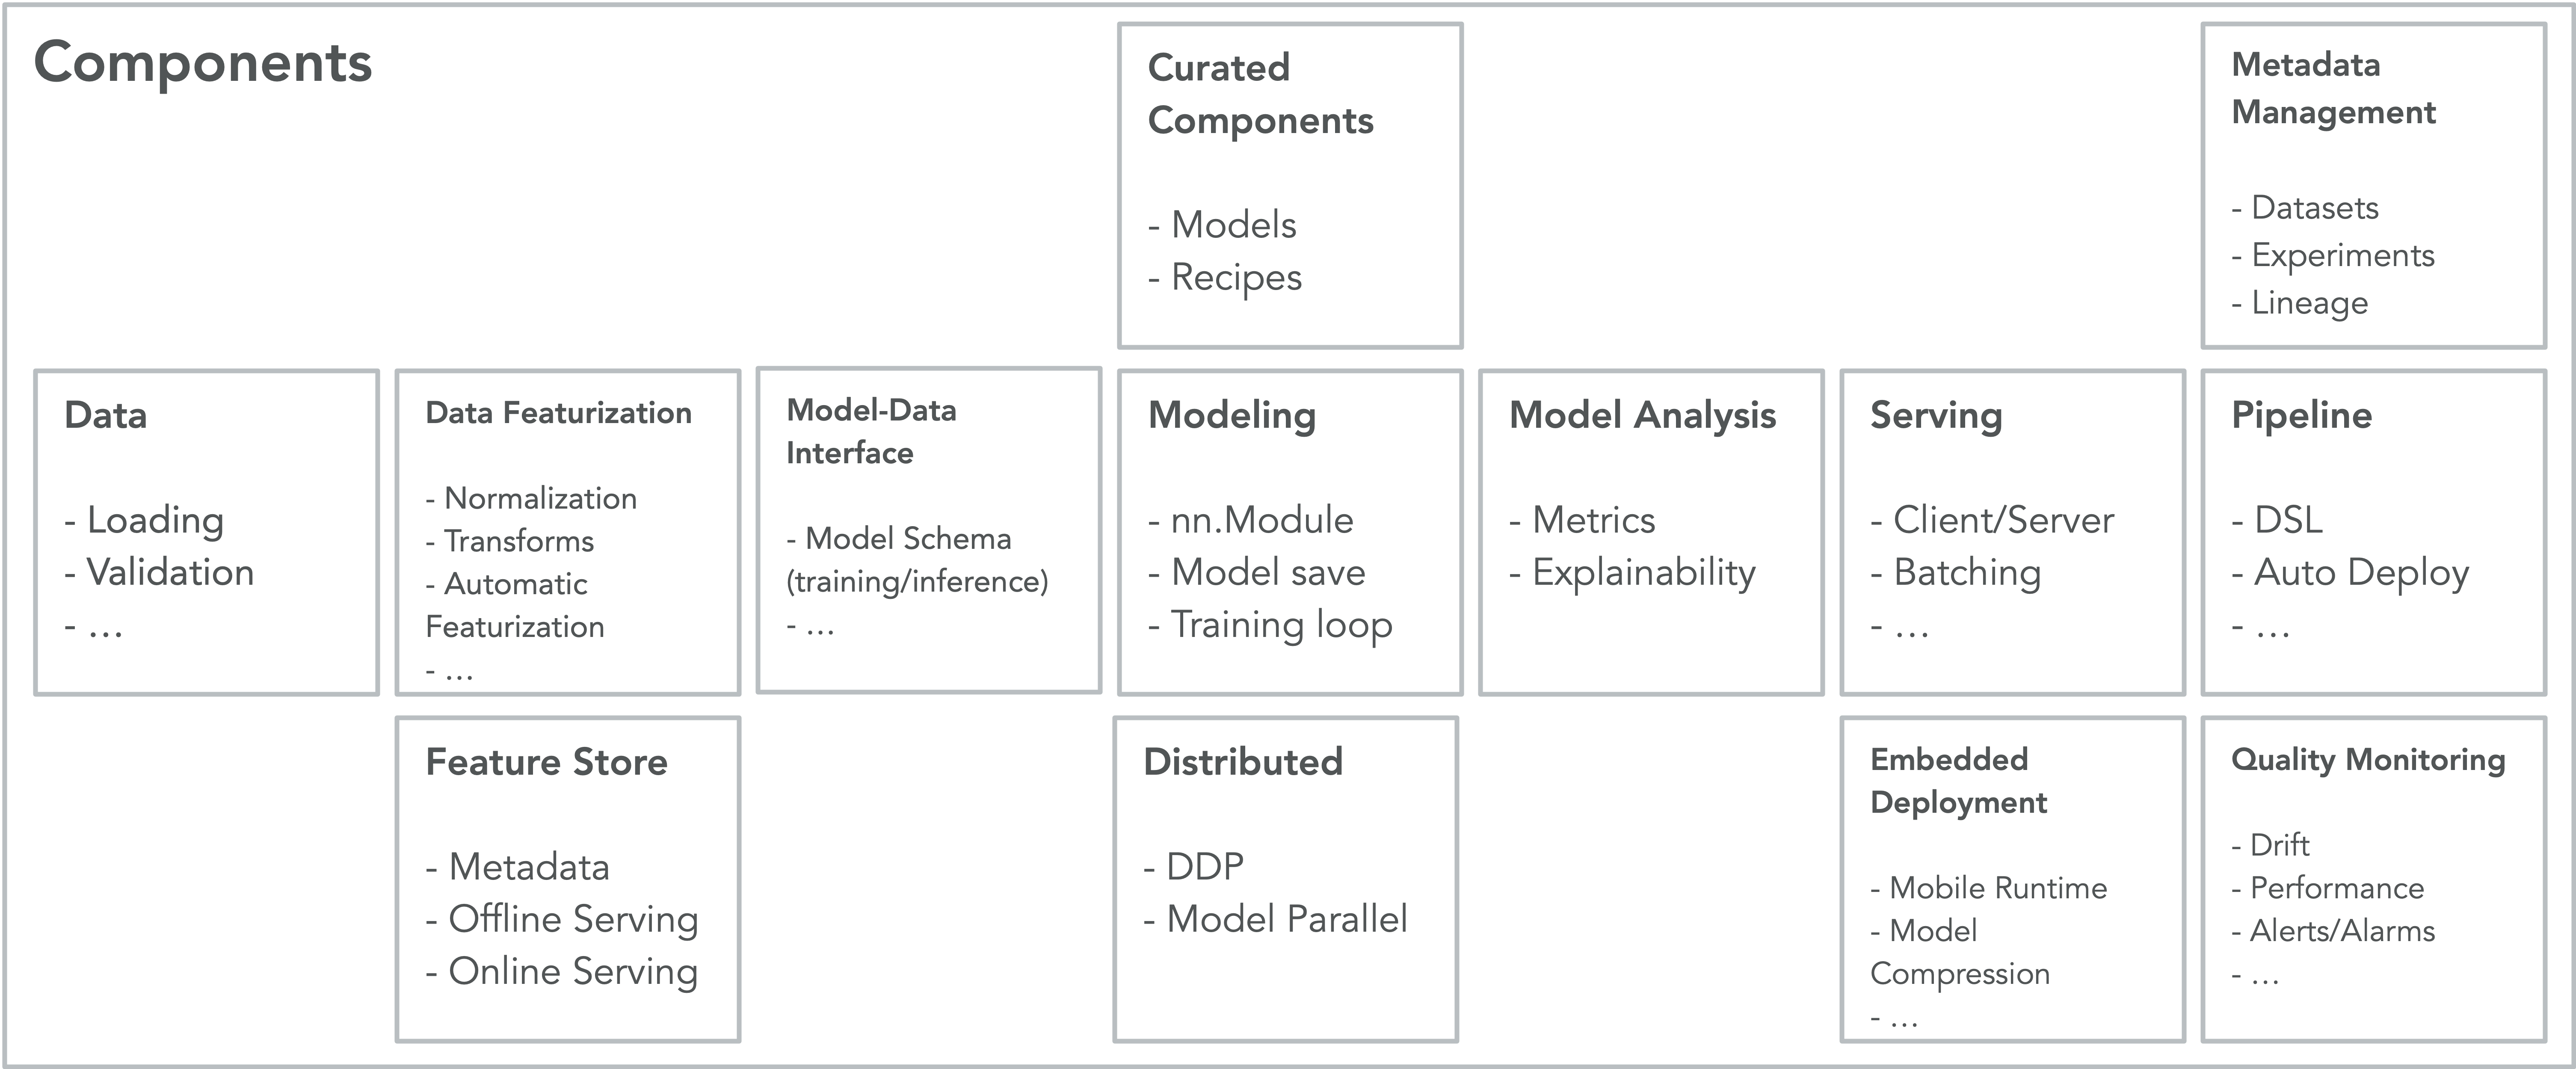
Diagram above for illustration purposes only. Not all boxes are currently available out-of-the-box.
This module contains a collection of builtin TorchX components. The directory
structure is organized by component category. Components are simply
templetized app specs. Think of them as a factory methods for different types
of job definitions. The functions that return specs.AppDef in this
module are what we refer to as components.
You can browse the library of components in the torchx.components module
or on our docs page.
Using Builtins
Once you’ve found a builtin component, you can either:
Run the component as a job
Use the component in the context of a workflow (pipeline)
In both cases, the component will run as a job, with the difference being that the job will run as a standalone job directly on a scheduler or a “stage” in a workflow with upstream and/or downstream dependencies.
Note
Depending on the semantics o the component, the job may be single
node or distributed. For instance, if the component has a single
role where the role.num_replicas == 1, then the job is a single
node job. If the component has multiple roles and/or if any of the
role’s num_replicas > 1, then the job is a multi-node distributed job.
Not sure whether you should run the component as a job or as a pipeline stage? Use this rule of thumb:
Just getting started? Familiarize yourself with the component by running it as a job
Need job dependencies? Run the components as pipeline stages
Don’t need job dependencies? Run the component as a job
Validating
To validate that you’ve defined your component correctly you can either:
(easiest) Dryrun your component’s
--helpwith the cli:torchx run --dryrun ~/component.py:train --helpUse the component linter (see dist_test.py as an example)
Running as a Job
You can run a component as a job with the torchx cli or programmatically with the torchx.runner. Both are identical, in fact the cli uses the runner under the hood, so the choice is yours. The quickstart guide walks though the basics for you to get started.
Programmatic Run
To run builtins or your own component programmatically, simply invoke the
component as a regular python function and pass it along to the torchx.runner.
Below is an example of calling the utils.echo builtin:
from torchx.components.utils import echo
from torchx.runner import get_runner

get_runner().run(echo(msg="hello world"), scheduler="local_cwd")
CLI Run (Builtins)
When running components from the cli, you have to pass which component function to invoke.
For builtin components this is of the form {component_module}.{component_fn}, where
the {component_module} is the module path of the component relative to torchx.components
and the {component_fn} is the component function within that module. So for
torchx.components.utils.echo, we’d drop the torchx.components prefix and run it as
$ torchx run utils.echo --msg "hello world"
See CLI docs for more information.
CLI Run (Custom)
To run your custom component with the cli, you have to use a slightly different syntax of
the form {component_path}:{component_fn}. Where {component_path} is the
file path of your component’s python file, and {component_fn} is the name of the
component function within that file. Assume your component is in /home/bob/component.py
and the component function is called train(), you would run this as
# option 1. use absolute path
$ torchx run /home/bob/component.py:train --help

# option 2. let the shell do the expansion
$ torchx run ~/component.py:train --help

# option 3. same but after CWD to $HOME
$ cd ~/
$ torchx run ./component.py:train --help

# option 4. files can be relative to CWD
$ cd ~/
$ torchx run component.py:train --help
Note
builtins can be run this way as well given that you know the install directory of TorchX!
Passing Component Params from CLI
Since components are simply python functions, using them programmatically is straight forward.
As seen above, when running components via the cli’s run subcommand the component parameters are passed
as program arguments using the double-dash + param_name syntax (e.g --param1=1 or --param1 1).
The cli autogenerates argparse parser based on the
docstring of the component. Below is a summary on how to pass component parameters of various types,
imagine the component is defined as:
# in comp.py
from typing import Dict, List
import torchx.specs as specs

def f(i: int, f: float, s: str, b: bool, l: List[str], d: Dict[str, str], *args) -> specs.AppDef:
   """
   Example component

   Args:
       i: int param
       f: float param
       s: string param
       b: bool param
       l: list param
       d: map param
       args: varargs param

   Returns: specs.AppDef
   """

   pass
Help:
torchx run comp.py:f --helpPrimitives (
int,float,str):torchx run comp.py:f --i 1 --f 1.2 --s "bar"Bool:
torchx run comp.py:f --b True(or--b False)Maps:
torchx run comp.py:f --d k1=v1,k2=v2,k3=v3Lists:
torchx run comp.py:f --l a,b,cVAR_ARG:
*argsare passed as positionals rather than arguments, hence they are specified at the end of the command. The--delimiter is used to start the VAR_ARGS section. This is useful when the component and application have the same arguments or when passing through the--helparg. Below are a few examples: **args=["arg1", "arg2", "arg3"]:torchx run comp.py:f --i 1 arg1 arg2 arg3**args=["--flag", "arg1"]:torchx run comp.py:f --i 1 --flag arg1 `` * ``*args=["--help"]:torchx run comp.py:f -- --help**args=["--i", "2"]:torchx run comp.py:f --i 1 -- --i 2
Run in a Pipeline
The torchx.pipelines define adapters that convert a torchx component into the object that represents a pipeline “stage” in the target pipeline platform (see Pipelines for a list of supported pipeline orchestrators).
Additional Resources
See:
Components defined in this module as expository examples
Defining your own component quick start guide
Component best practices guide
App best practices guide
