Overview
NVIDIA Jetson Nano, part of the Jetson family of products or Jetson modules, is a small yet powerful Linux (Ubuntu) based embedded computer with 2/4GB GPU. With it, you can run many PyTorch models efficiently. This document summarizes our experience of running different deep learning models using 3 different mechanisms on Jetson Nano:
- Jetson Inference the higher-level NVIDIA API that has built-in support for running most common computer vision models which can be transfer-learned with PyTorch on the Jetson platform.
- TensorRT, an SDK for high-performance inference from NVIDIA that requires the conversion of a PyTorch model to ONNX, and then to the TensorRT engine file that the TensorRT runtime can run.
- PyTorch with the direct PyTorch API
torch.nnfor inference.
Setting up Jetson Nano
After purchasing a Jetson Nano here, simply follow the clear step-by-step instructions to download and write the Jetson Nano Developer Kit SD Card Image to a microSD card, and complete the setup. After the setup is done and the Nano is booted, you’ll see the standard Linux prompt along with the username and the Nano name used in the setup.
To check the GPU status on Nano, run the following commands:
sudo pip3 install jetson-stats
sudo jtop
You’ll see information, including:
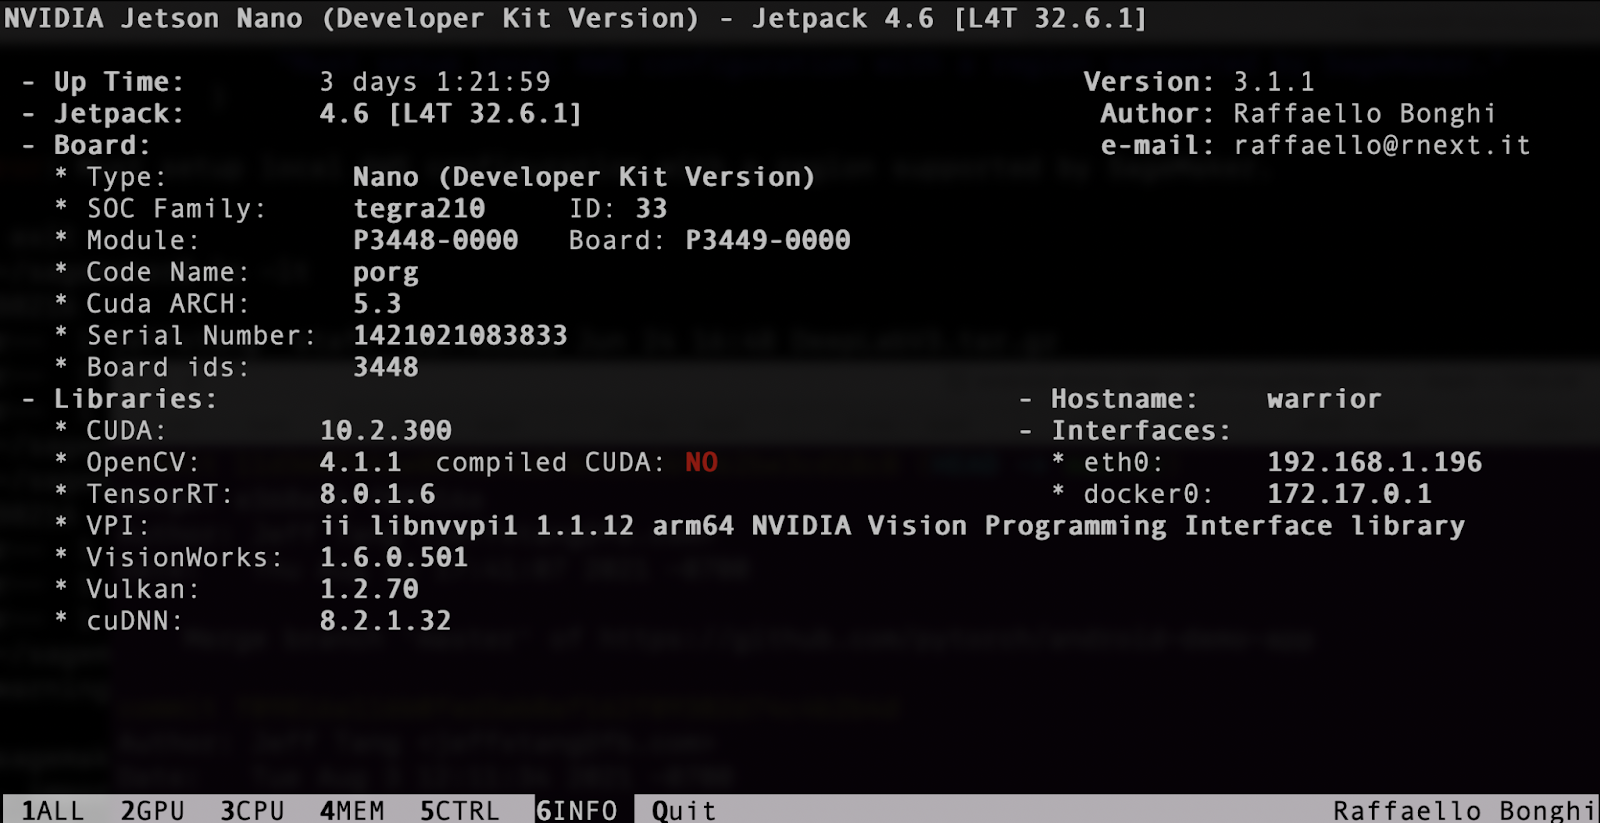
You can also see the installed CUDA version:
$ ls -lt /usr/local
lrwxrwxrwx  1 root root   22 Aug  2 01:47 cuda -> /etc/alternatives/cuda
lrwxrwxrwx  1 root root   25 Aug  2 01:47 cuda-10 -> /etc/alternatives/cuda-10
drwxr-xr-x 12 root root 4096 Aug  2 01:47 cuda-10.2
To use a camera on Jetson Nano, for example, Arducam 8MP IMX219, follow the instructions here or run the commands below after installing a camera module:
cd ~
wget https://github.com/ArduCAM/MIPI_Camera/releases/download/v0.0.3/install_full.sh
chmod +x install_full.sh
./install_full.sh -m arducam
Another way to do this is to use the original Jetson Nano camera driver:
sudo dpkg -r arducam-nvidia-l4t-kernel
sudo shutdown -r now
Then, use ls /dev/video0 to confirm the camera is found:
$ ls /dev/video0
/dev/video0
And finally, the following command to see the camera in action:
nvgstcapture-1.0 --orientation=2
Using Jetson Inference
NVIDIA Jetson Inference API offers the easiest way to run image recognition, object detection, semantic segmentation, and pose estimation models on Jetson Nano. Jetson Inference has TensorRT built-in, so it’s very fast.
To test run Jetson Inference, first clone the repo and download the models:
git clone --recursive https://github.com/dusty-nv/jetson-inference
cd jetson-inference
Then use the pre-built Docker Container that already has PyTorch installed to test run the models:
docker/run.sh --volume ~/jetson_inference:/jetson_inference
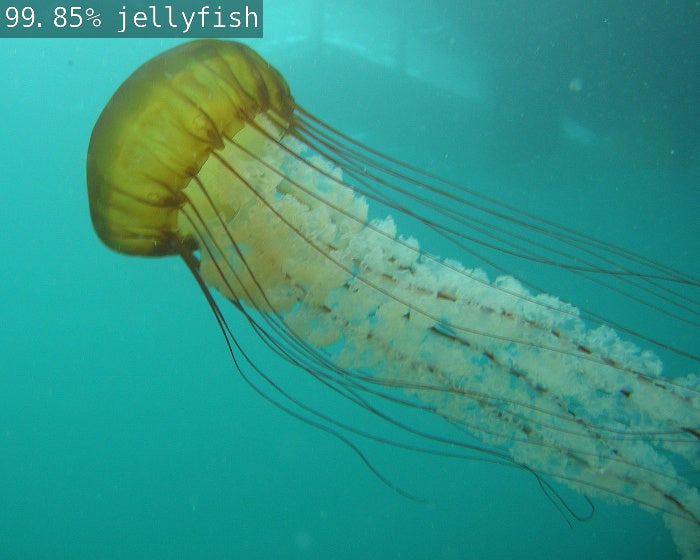
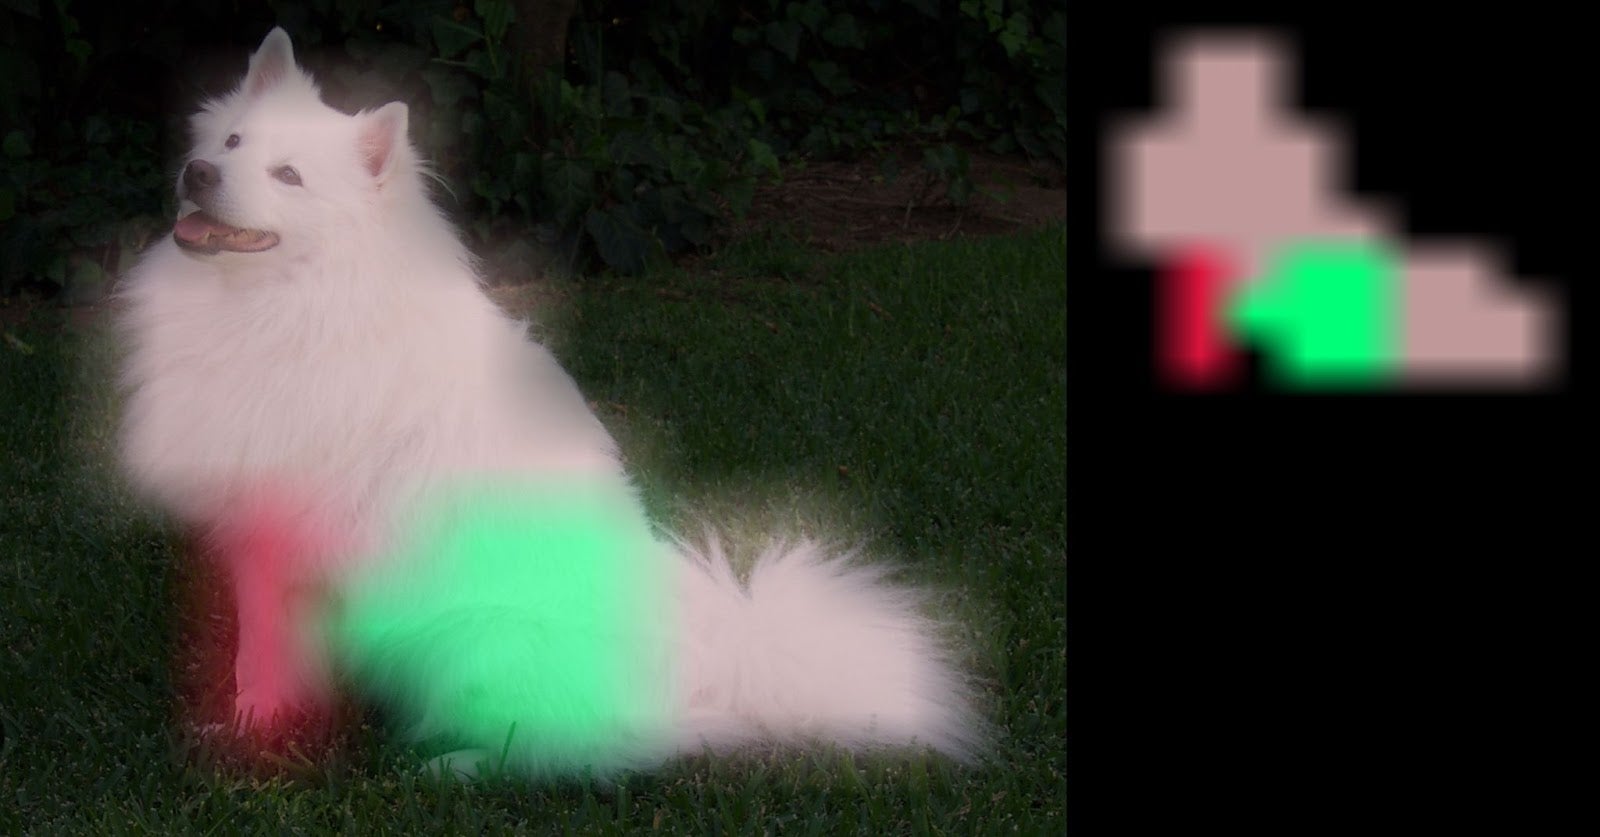
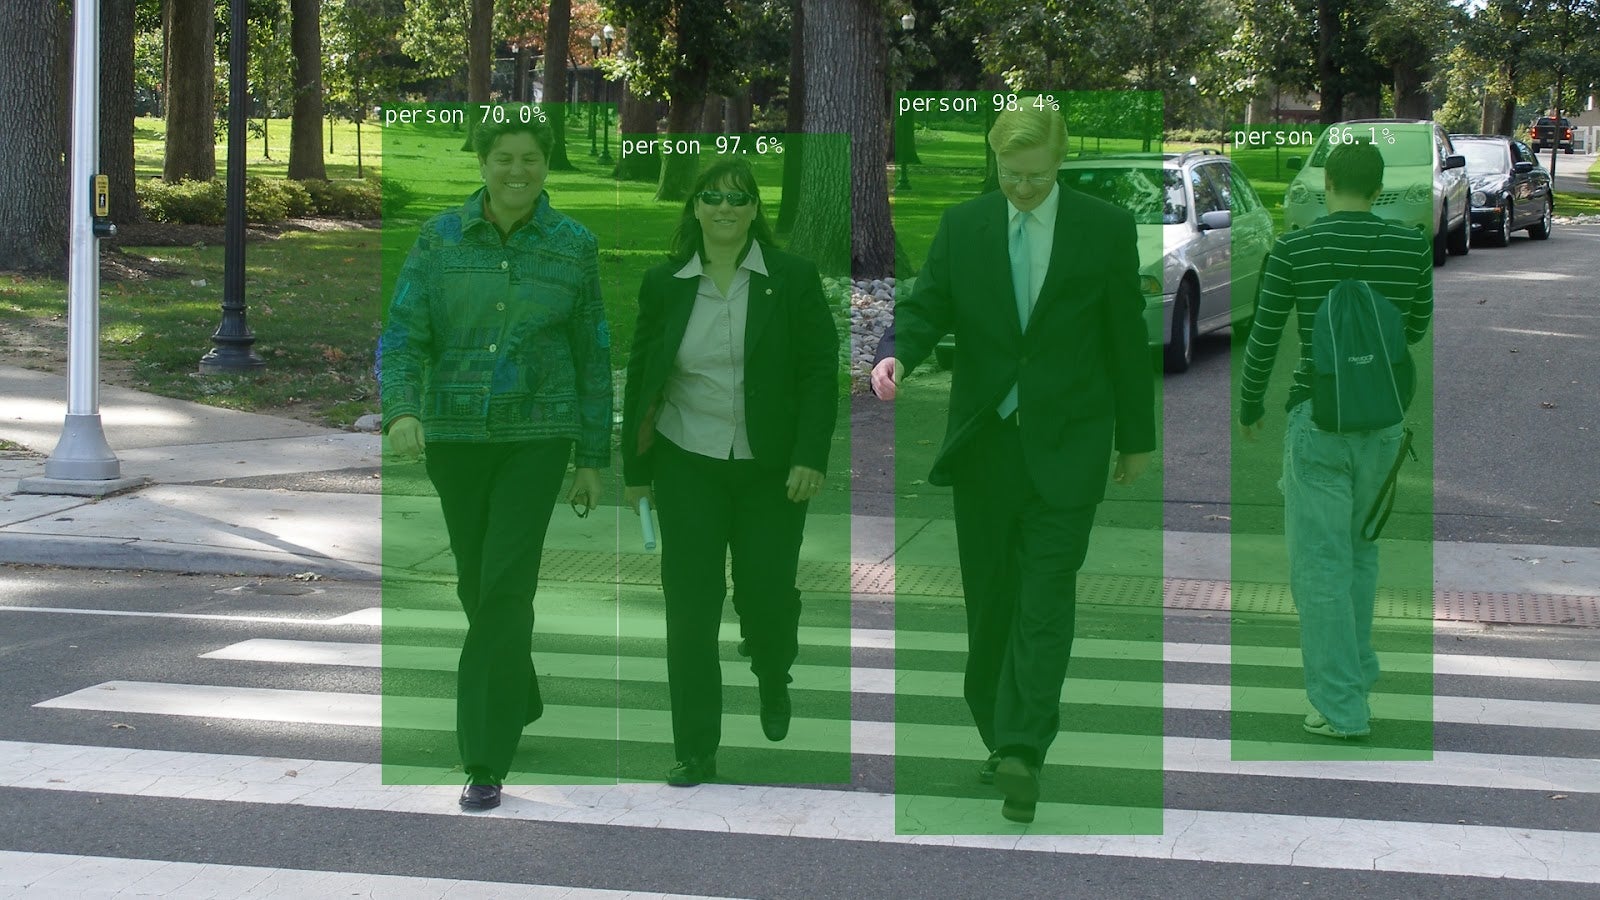
To run image recognition, object detection, semantic segmentation, and pose estimation models on test images, use the following:
cd build/aarch64/bin
./imagenet.py images/jellyfish.jpg /jetson_inference/jellyfish.jpg
./segnet.py images/dog.jpg /jetson_inference/dog.jpeg
./detectnet.py images/peds_0.jpg /jetson_inference/peds_0.jpg
./posenet.py images/humans_0.jpg /jetson_inference/pose_humans_0.jpg
Four result images from running the four different models will be generated. Exit the docker image to see them:
$ ls -lt ~/jetson_inference/
-rw-r--r-- 1 root root  68834 Oct 15 21:30 pose_humans_0.jpg
-rw-r--r-- 1 root root 914058 Oct 15 21:30 peds_0.jpg
-rw-r--r-- 1 root root 666239 Oct 15 21:30 dog.jpeg
-rw-r--r-- 1 root root 179760 Oct 15 21:29 jellyfish.jpg

You can also use the docker image to run PyTorch models because the image has PyTorch, torchvision and torchaudio installed:
# pip list|grep torch
torch (1.9.0)
torchaudio (0.9.0a0+33b2469)
torchvision (0.10.0a0+300a8a4)
Although Jetson Inference includes models already converted to the TensorRT engine file format, you can fine-tune the models by following the steps in Transfer Learning with PyTorch (for Jetson Inference) here.
Using TensorRT
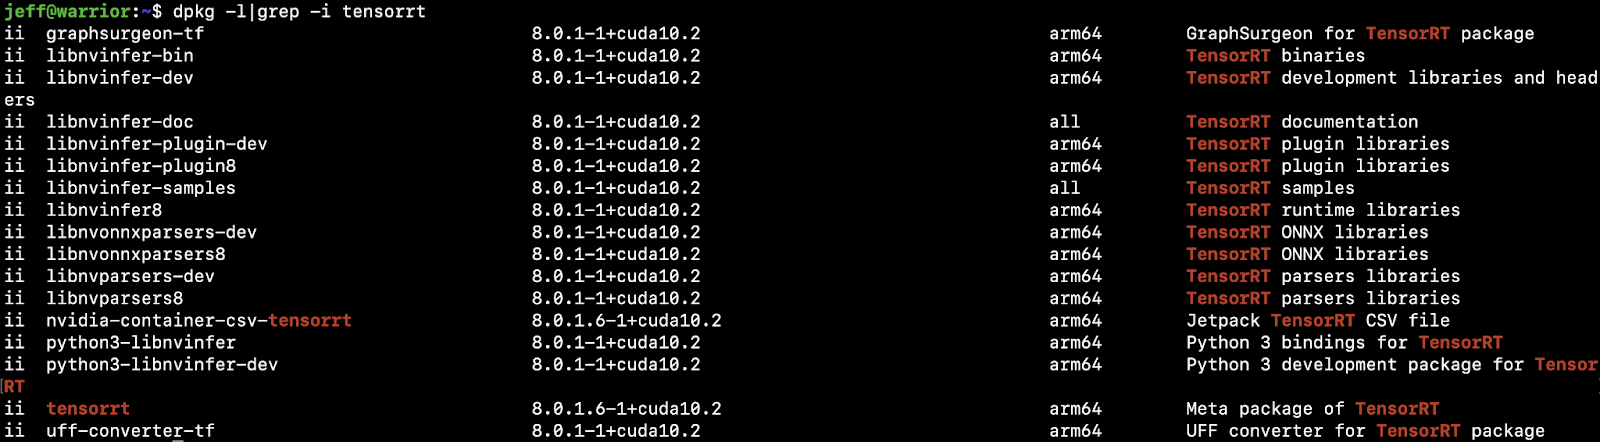
TensorRT is an SDK for high-performance inference from NVIDIA. Jetson Nano supports TensorRT via the Jetpack SDK, included in the SD Card image used to set up Jetson Nano. To confirm that TensorRT is already installed in Nano, run dpkg -l|grep -i tensorrt:
Theoretically, TensorRT can be used to “take a trained PyTorch model and optimize it to run more efficiently during inference on an NVIDIA GPU.” Follow the instructions and code in the notebook to see how to use PyTorch with TensorRT through ONNX on a torchvision Resnet50 model:
- How to convert the model from PyTorch to ONNX;
- How to convert the ONNX model to a TensorRT engine file;
- How to run the engine file with the TensorRT runtime for performance improvement: inference time improved from the original 31.5ms/19.4ms (FP32/FP16 precision) to 6.28ms (TensorRT).
You can replace the Resnet50 model in the notebook code with another PyTorch model, go through the conversion process above, and run the finally converted model TensorRT engine file with the TensorRT runtime to see the optimized performance. But be aware that due to the Nano GPU memory size, models larger than 100MB are likely to fail to run, with the following error information:
Error Code 1: Cuda Runtime (all CUDA-capable devices are busy or unavailable)
You may also see an error when converting a PyTorch model to ONNX model, which may be fixed by replacing:
torch.onnx.export(resnet50, dummy_input, "resnet50_pytorch.onnx", verbose=False)
with:
torch.onnx.export(model, dummy_input, "deeplabv3_pytorch.onnx", opset_version=11, verbose=False)
Using PyTorch
First, to download and install PyTorch 1.9 on Nano, run the following commands (see here for more information):
wget https://nvidia.box.com/shared/static/p57jwntv436lfrd78inwl7iml6p13fzh.whl -O torch-1.8.0-cp36-cp36m-linux_aarch64.whl -O torch-1.9.0-cp36-cp36m-linux_aarch64.whl
sudo apt-get install python3-pip libopenblas-base libopenmpi-dev
pip3 install Cython
pip3 install numpy torch-1.9.0-cp36-cp36m-linux_aarch64.whl
To download and install torchvision 0.10 on Nano, run the commands below:
https://drive.google.com/uc?id=1tU6YlPjrP605j4z8PMnqwCSoP6sSC91Z
pip3 install torchvision-0.10.0a0+300a8a4-cp36-cp36m-linux_aarch64.whl
After the steps above, run this to confirm:
$ pip3 list|grep torch
torch (1.9.0)
torchvision (0.10.0)
You can also use the docker image described in the section Using Jetson Inference (which also has PyTorch and torchvision installed), to skip the manual steps above.
The official YOLOv5 repo is used to run the PyTorch YOLOv5 model on Jetson Nano. After logging in to Jetson Nano, follow the steps below:
- Get the repo and install what’s required:
git clone https://github.com/ultralytics/yolov5
cd yolov5
pip install -r requirements.txt
- Run
python3 detect.py, which by default uses the PyTorch yolov5s.pt model. You should see something like:
detect: weights=yolov5s.pt, source=data/images, imgsz=[640, 640], conf_thres=0.25, iou_thres=0.45, max_det=1000, device=, view_img=False, save_txt=False, save_conf=False, save_crop=False, nosave=False, classes=None, agnostic_nms=False, augment=False, visualize=False, update=False, project=runs/detect, name=exp, exist_ok=False, line_thickness=3, hide_labels=False, hide_conf=False, half=False
YOLOv5 🚀 v5.0-499-g48b00db torch 1.9.0 CUDA:0 (NVIDIA Tegra X1, 3956.1015625MB)

Fusing layers...
Model Summary: 224 layers, 7266973 parameters, 0 gradients
image 1/5 /home/jeff/repos/yolov5-new/yolov5/data/images/bus.jpg: 640x480 4 persons, 1 bus, 1 fire hydrant, Done. (0.142s)
...
The inference time on Jetson Nano GPU is about 140ms, more than twice as fast as the inference time on iOS or Android (about 330ms).
If you get an error “ImportError: The _imagingft C module is not installed.” then you need to reinstall pillow:
sudo apt-get install libpng-dev
sudo apt-get install libfreetype6-dev
pip3 uninstall pillow
pip3 install --no-cache-dir pillow
After successfully completing the python3 detect.py run, the object detection results of the test images located in data/images will be in the runs/detect/exp directory. To test the detection with a live webcam instead of local images, use the --source 0 parameter when running python3 detect.py):
~/repos/yolov5$ ls -lt runs/detect/exp10
total 1456
-rw-rw-r-- 1 jeff jeff 254895 Oct 15 16:12 zidane.jpg
-rw-rw-r-- 1 jeff jeff 202674 Oct 15 16:12 test3.png
-rw-rw-r-- 1 jeff jeff 217117 Oct 15 16:12 test2.jpg
-rw-rw-r-- 1 jeff jeff 305826 Oct 15 16:12 test1.png
-rw-rw-r-- 1 jeff jeff 495760 Oct 15 16:12 bus.jpg
Using the same test files used in the PyTorch iOS YOLOv5 demo app or Android YOLOv5 demo app, you can compare the results generated with running the YOLOv5 PyTorch model on mobile devices and Jetson Nano:
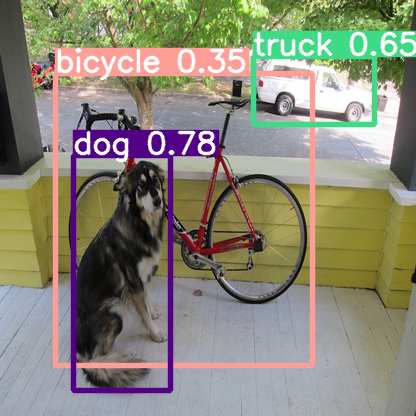
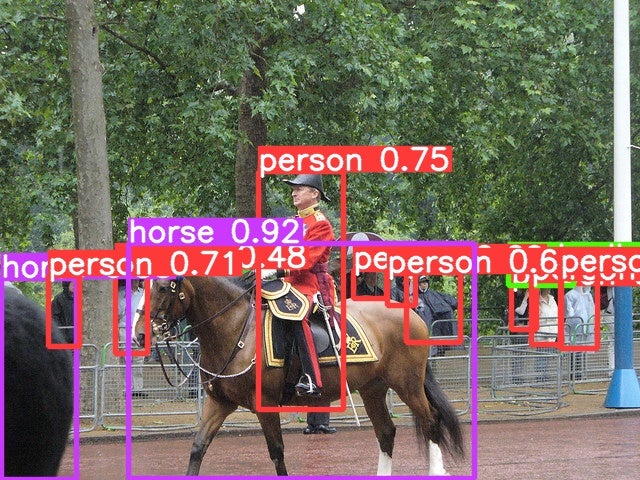
Figure 1. PyTorch YOLOv5 on Jetson Nano.
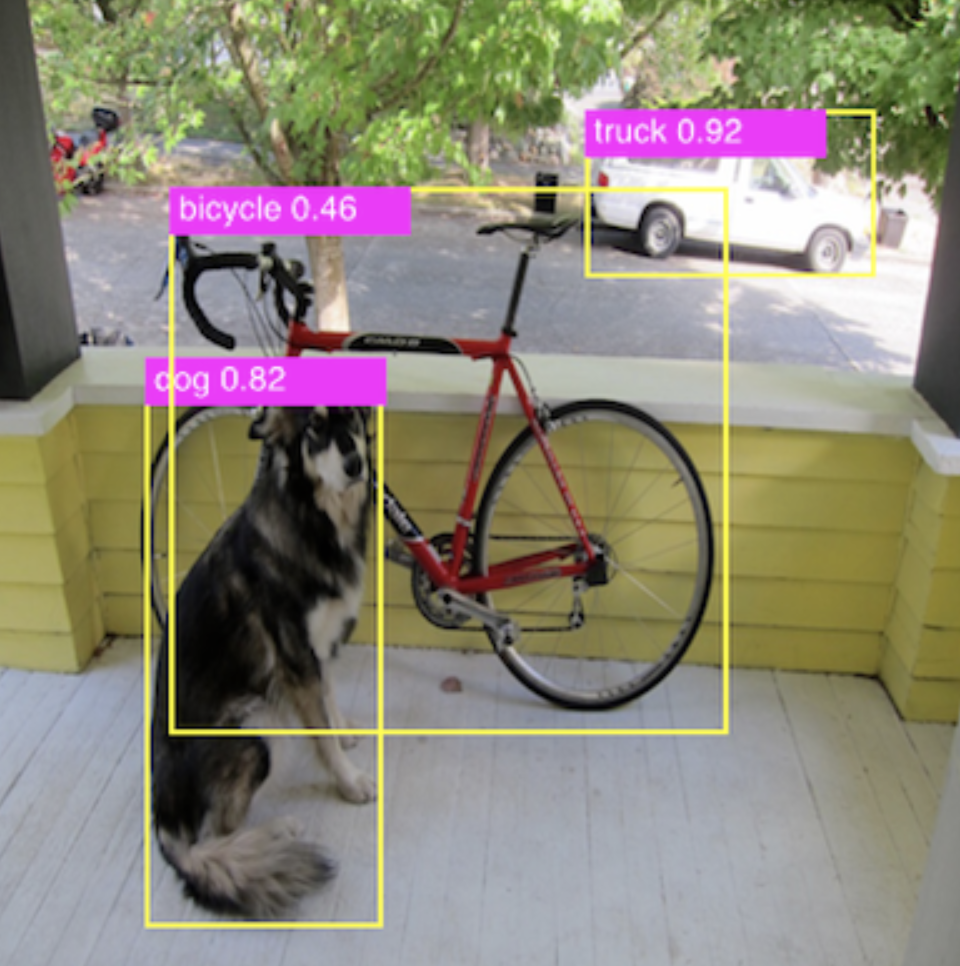
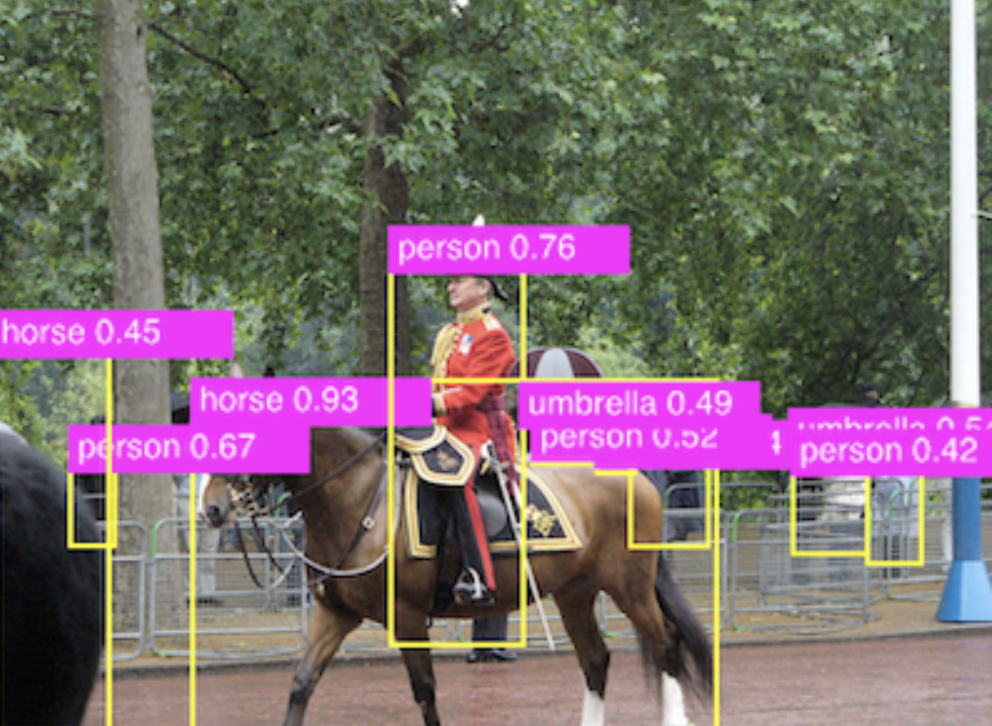
Figure 2. PyTorch YOLOv5 on iOS.
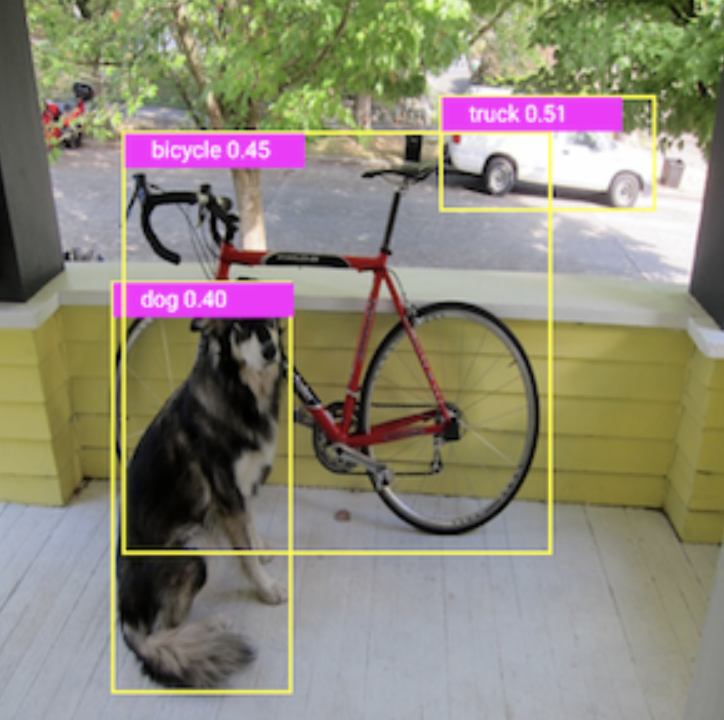
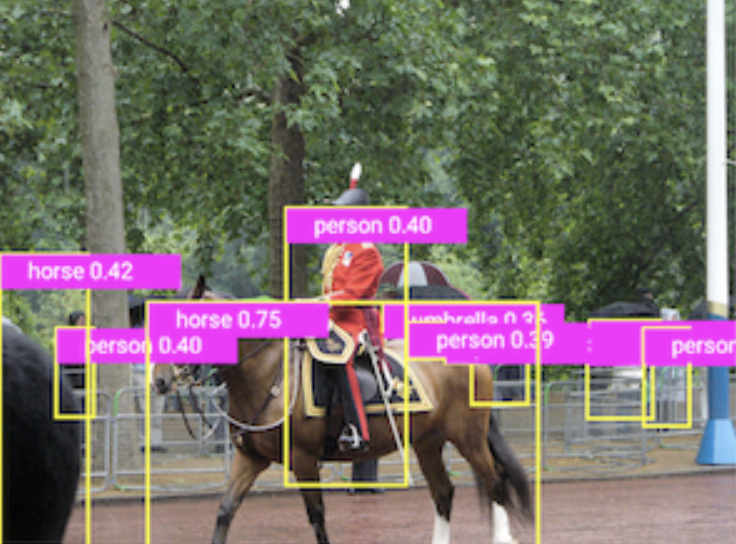
Figure 3. PyTorch YOLOv5 on Android.
Summary
Based on our experience of running different PyTorch models for potential demo apps on Jetson Nano, we see that even Jetson Nano, a lower-end of the Jetson family of products, provides a powerful GPU and embedded system that can directly run some of the latest PyTorch models, pre-trained or transfer learned, efficiently.
Building PyTorch demo apps on Jetson Nano can be similar to building PyTorch apps on Linux, but you can also choose to use TensorRT after converting the PyTorch models to the TensorRT engine file format.
But if you just need to run some common computer vision models on Jetson Nano using NVIDIA’s Jetson Inference which supports image recognition, object detection, semantic segmentation, and pose estimation models, then this is the easiest way.
References
Torch-TensorRT, a compiler for PyTorch via TensorRT: https://github.com/NVIDIA/Torch-TensorRT/
Jetson Inference docker image details: https://github.com/dusty-nv/jetson-inference/blob/master/docs/aux-docker.md
A guide to using TensorRT on the NVIDIA Jetson Nano: https://docs.donkeycar.com/guide/robot_sbc/tensorrt_jetson_nano/ including:
- Use Jetson as a portable GPU device to run an NN chess engine model: https://medium.com/@ezchess/jetson-lc0-running-leela-chess-zero-on-nvidia-jetson-a-portable-gpu-device-a213afc9c018
- A MaskEraser app using PyTorch and torchvision, installed directly with pip: https://github.com/INTEC-ATI/MaskEraser#install-pytorch