Note
Click here to download the full example code
Tensor transforms and JIT
This example illustrates various features that are now supported by the image transformations on Tensor images. In particular, we show how image transforms can be performed on GPU, and how one can also script them using JIT compilation.
Prior to v0.8.0, transforms in torchvision have traditionally been PIL-centric and presented multiple limitations due to that. Now, since v0.8.0, transforms implementations are Tensor and PIL compatible and we can achieve the following new features:
transform multi-band torch tensor images (with more than 3-4 channels)
torchscript transforms together with your model for deployment
support for GPU acceleration
batched transformation such as for videos
read and decode data directly as torch tensor with torchscript support (for PNG and JPEG image formats)
Note
These features are only possible with Tensor images.
from pathlib import Path

import matplotlib.pyplot as plt
import numpy as np

import torch
import torchvision.transforms as T
from torchvision.io import read_image


plt.rcParams["savefig.bbox"] = 'tight'
torch.manual_seed(1)


def show(imgs):
    fix, axs = plt.subplots(ncols=len(imgs), squeeze=False)
    for i, img in enumerate(imgs):
        img = T.ToPILImage()(img.to('cpu'))
        axs[0, i].imshow(np.asarray(img))
        axs[0, i].set(xticklabels=[], yticklabels=[], xticks=[], yticks=[])
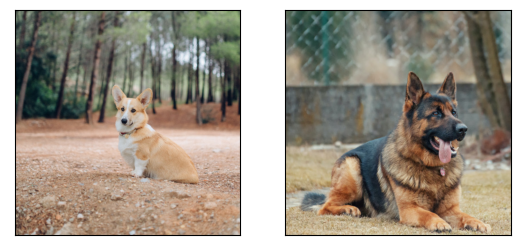
The read_image() function allows to read an image and
directly load it as a tensor

Transforming images on GPU
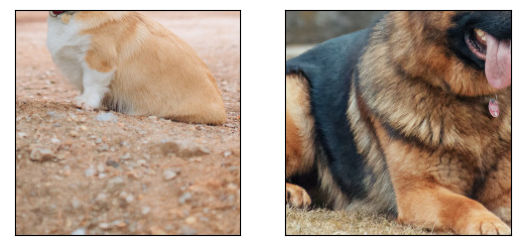
Most transforms natively support tensors on top of PIL images (to visualize the effect of the transforms, you may refer to see Illustration of transforms). Using tensor images, we can run the transforms on GPUs if cuda is available!
import torch.nn as nn

transforms = torch.nn.Sequential(
    T.RandomCrop(224),
    T.RandomHorizontalFlip(p=0.3),
)

device = 'cuda' if torch.cuda.is_available() else 'cpu'
dog1 = dog1.to(device)
dog2 = dog2.to(device)

transformed_dog1 = transforms(dog1)
transformed_dog2 = transforms(dog2)
show([transformed_dog1, transformed_dog2])

Scriptable transforms for easier deployment via torchscript
We now show how to combine image transformations and a model forward pass,
while using torch.jit.script to obtain a single scripted module.
Let’s define a Predictor module that transforms the input tensor and then
applies an ImageNet model on it.
from torchvision.models import resnet18, ResNet18_Weights


class Predictor(nn.Module):

    def __init__(self):
        super().__init__()
        weights = ResNet18_Weights.DEFAULT
        self.resnet18 = resnet18(weights=weights, progress=False).eval()
        self.transforms = weights.transforms()

    def forward(self, x: torch.Tensor) -> torch.Tensor:
        with torch.no_grad():
            x = self.transforms(x)
            y_pred = self.resnet18(x)
            return y_pred.argmax(dim=1)
Now, let’s define scripted and non-scripted instances of Predictor and
apply it on multiple tensor images of the same size
predictor = Predictor().to(device)
scripted_predictor = torch.jit.script(predictor).to(device)

batch = torch.stack([dog1, dog2]).to(device)

res = predictor(batch)
res_scripted = scripted_predictor(batch)
We can verify that the prediction of the scripted and non-scripted models are the same:
import json

with open(Path('assets') / 'imagenet_class_index.json') as labels_file:
    labels = json.load(labels_file)

for i, (pred, pred_scripted) in enumerate(zip(res, res_scripted)):
    assert pred == pred_scripted
    print(f"Prediction for Dog {i + 1}: {labels[str(pred.item())]}")
Prediction for Dog 1: ['n02113023', 'Pembroke']
Prediction for Dog 2: ['n02106662', 'German_shepherd']
Since the model is scripted, it can be easily dumped on disk and re-used
import tempfile

with tempfile.NamedTemporaryFile() as f:
    scripted_predictor.save(f.name)

    dumped_scripted_predictor = torch.jit.load(f.name)
    res_scripted_dumped = dumped_scripted_predictor(batch)
assert (res_scripted_dumped == res_scripted).all()
Total running time of the script: ( 0 minutes 1.457 seconds)
